Laparoscopic Closed Access Technique
To start any laparoscopic procedure the peritoneal cavity needs to be accessed, first to establish pneumoperitoneum and subsequently to place a port for the laparoscope and add the placement of additional ports for various laparoscopic instruments. In closed access technique, pneumoperitoneum is created by a Veress needle (named for Janos Veress). The Veress needle was originally developed by Janos Veress to give patients with tuberculosis iatrogenic pneumothorax without damaging the underlying lung parenchyma. It has a small-bore (1.8 to 2.2 mm) needle with a spring-loaded protective obturator with a side hole that recoils to cover the end of the needle, allowing entry into a body cavity without traumatizing the underlying organs. The maximum flow of gas through the eye of the Veress needle is 2.5 liters/minute only but for safety, it should be kept at 1 liter/minute to prevent accidental gas embolism. This is a blind technique and most practiced way of access by surgeons and gynecologists worldwide.
When choosing the site of closed access, previous surgical incisions, or any anatomical abnormality, should be noted. Sites that have not been previously instrumented are preferred for initial access. Closed technique of access merely by Veress needle insertion and creation of pneumoperitoneum is an easy way of access but it is not possible in some of the minimal access surgical procedures like axilloscopy, retroperitoneoscopy and totally extraperitoneal approach of hernia repair. In general, the closed technique by Veress needle is possible only if there is a preformed cavity like the abdomen.
The creation of pneumoperitoneum is one of the most important steps in laparoscopy. The aim is to build up a good protective cushion of gas to ensure the safe entry of the trocar and cannula.
Veress Needle Insertion
The standard method of insufflation of the abdominal cavity is via a Veress needle inserted through a small skin incision over the inferior crease of umbilicus. Disposable and reusable metal Veress needles are available commercially in different lengths (8cm to 20cm), i.e. long for obese patients, short for thin or pediatric patients.
Veress Needle inventor Janos Veress
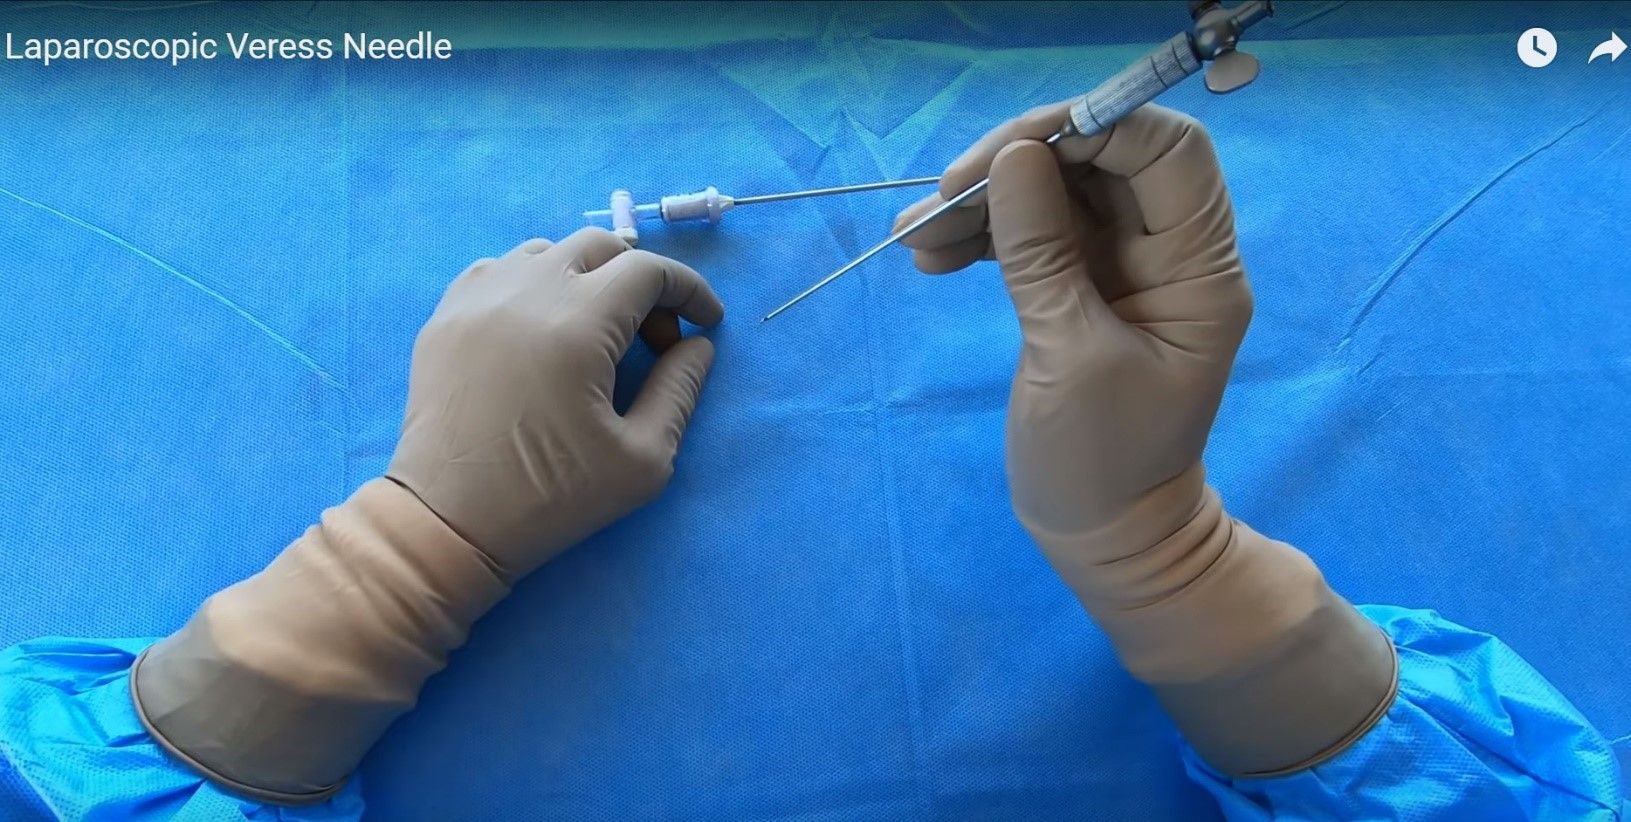
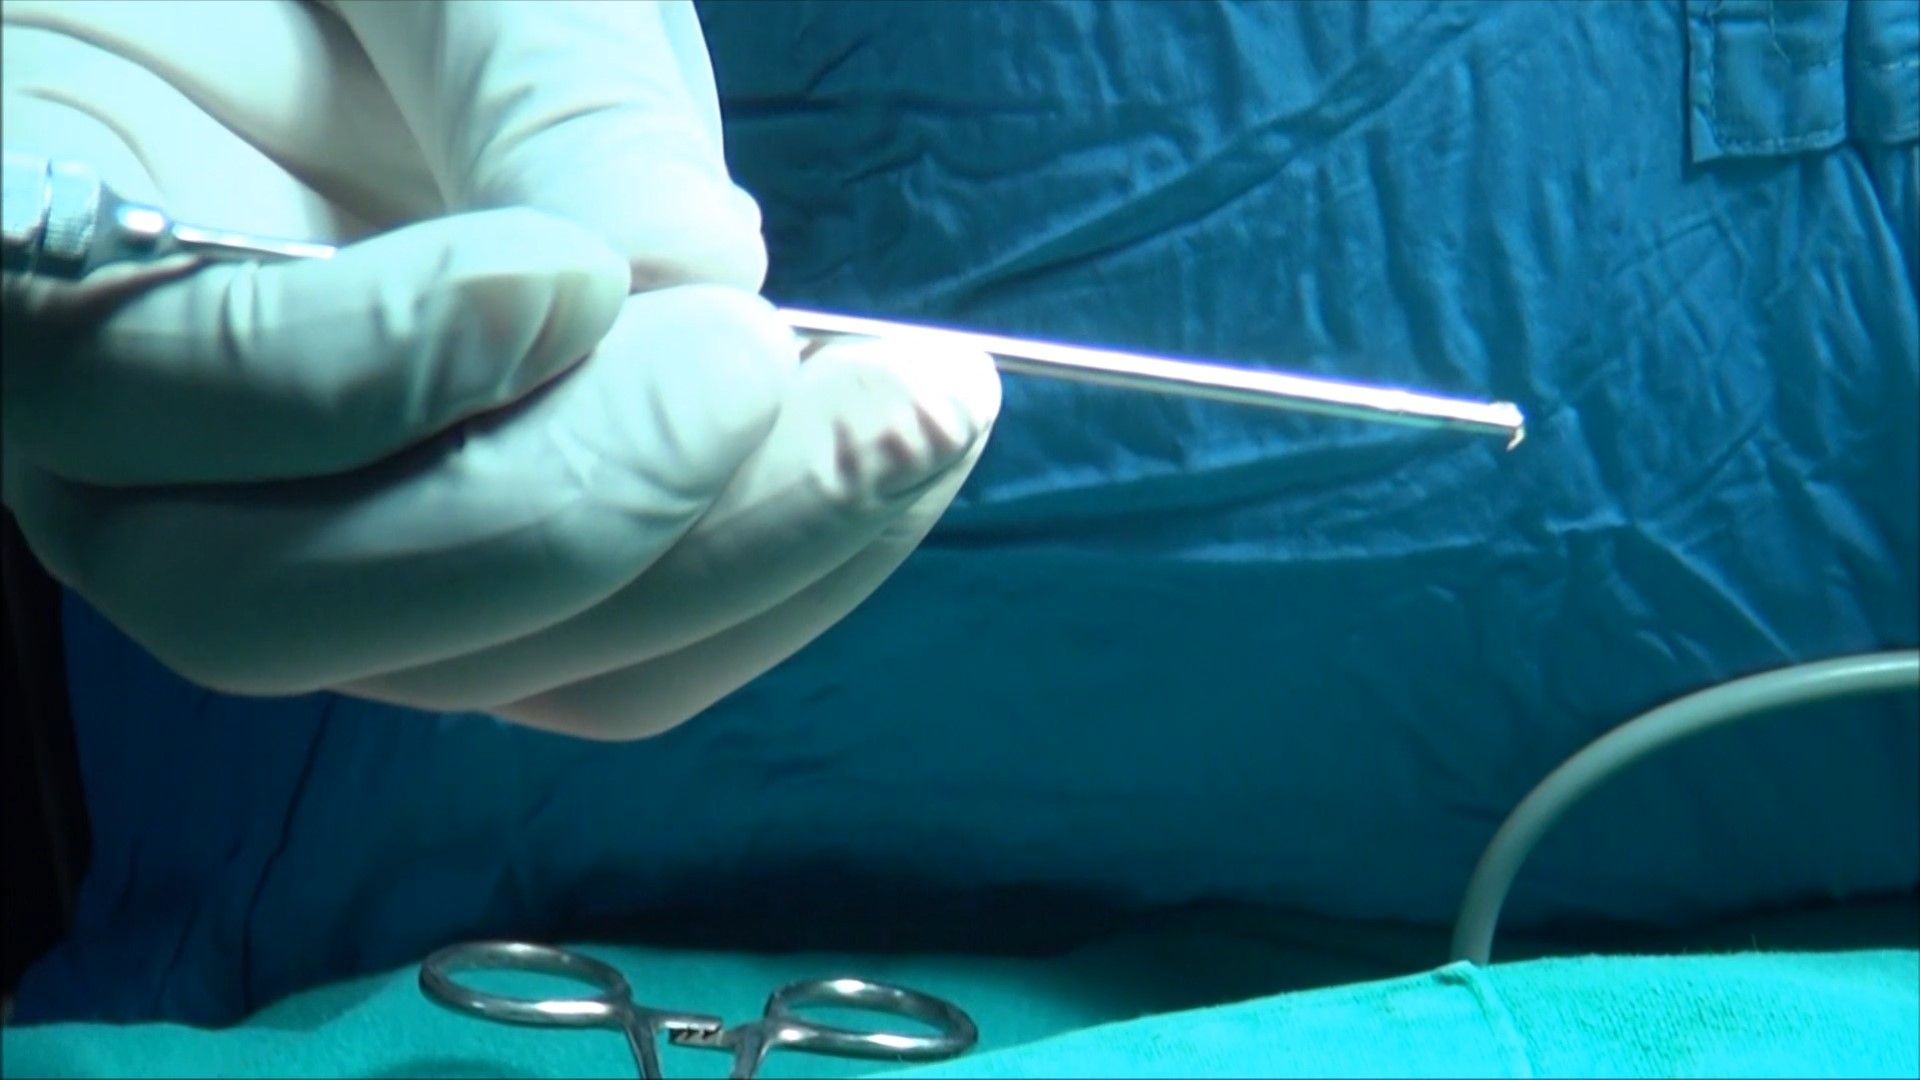
Before using a Veress needle, it should be checked for its patency and spring action. The spring action of Veress needle can be checked by pulling the head out. The disposable Veress needle spring action can be checked by pressing the sharp end against any sterilized draping.
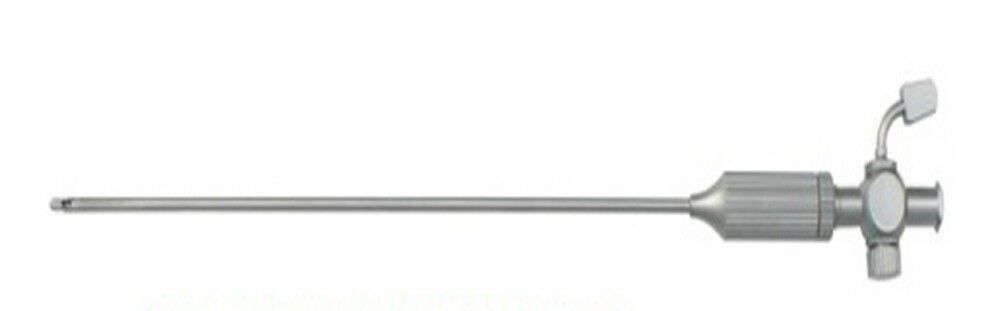
Veress Needle
Insufflation via the Veress needle creates a cushion of gas over the bowel for the insertion of the first trocar. Insufflation then retracts the anterior abdominal wall, exposing the operative field.
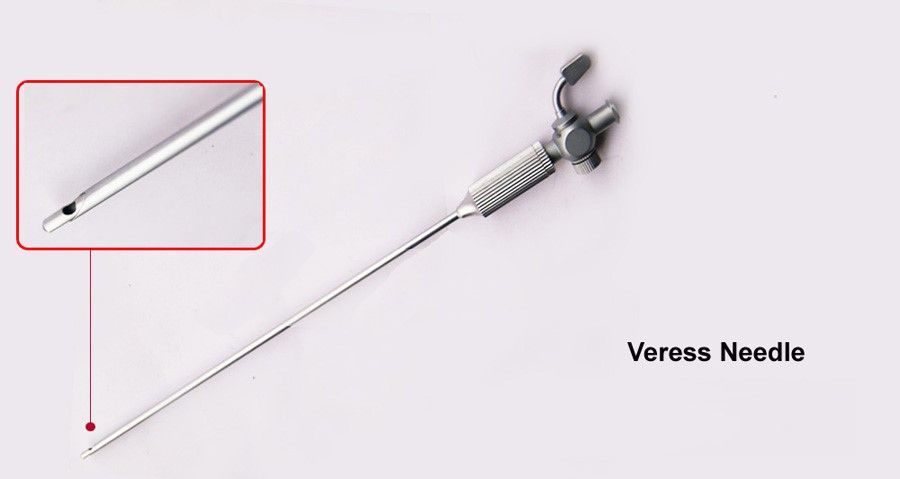
Eye of Veress Needle
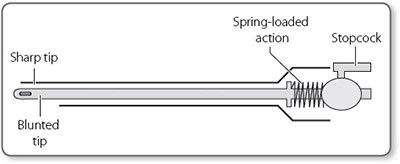
Parts of Veress Needle
Preparation of Patient
The patient should be nil orally since the morning of surgery. In some of the procedures like laparoscopic hysterectomy or colorectal surgery where distended bowel may interfere, it is good to prepare bowel prior to the night of surgery by giving some mild purgative (polyethylene glycol). Bowel preparation can minimize the need for the accessory port to retract the bowel.
Before coming to the operation theater, the patient should always void urine. The full urinary bladder may get perforation at the time of the insertion of the Veress needle or trocar. If the laparoscopic procedure is of short duration and is going to be performed of the upper abdomen, then Foley’s catheterization is not necessary. If gynecological operative surgery or any major general surgical lower abdominal procedure has to be performed (like hernia or adhesiolysis) it is wise to insert Foley’s catheter.
If a surgeon is going to perform any upper abdominal procedure like cholecystectomy, fundoplication, duodenal perforation, hiatus hernia, etc. it is good practice to have a nasogastric tube in place. A distended stomach will not allow proper visualization of Calot’s triangle and then the surgeon has to apply more traction over fundus or Hartman pouch, and this may cause the tenting of CBD followed by accidental injury. In gynecological or lower abdominal minor laparoscopic procedures, it is not necessary to put the nasogastric tube. In minimal access surgery, shaving of skin is not a must and if necessary, it should be done on an operation table itself by surgeon.
Operating Room Set-up
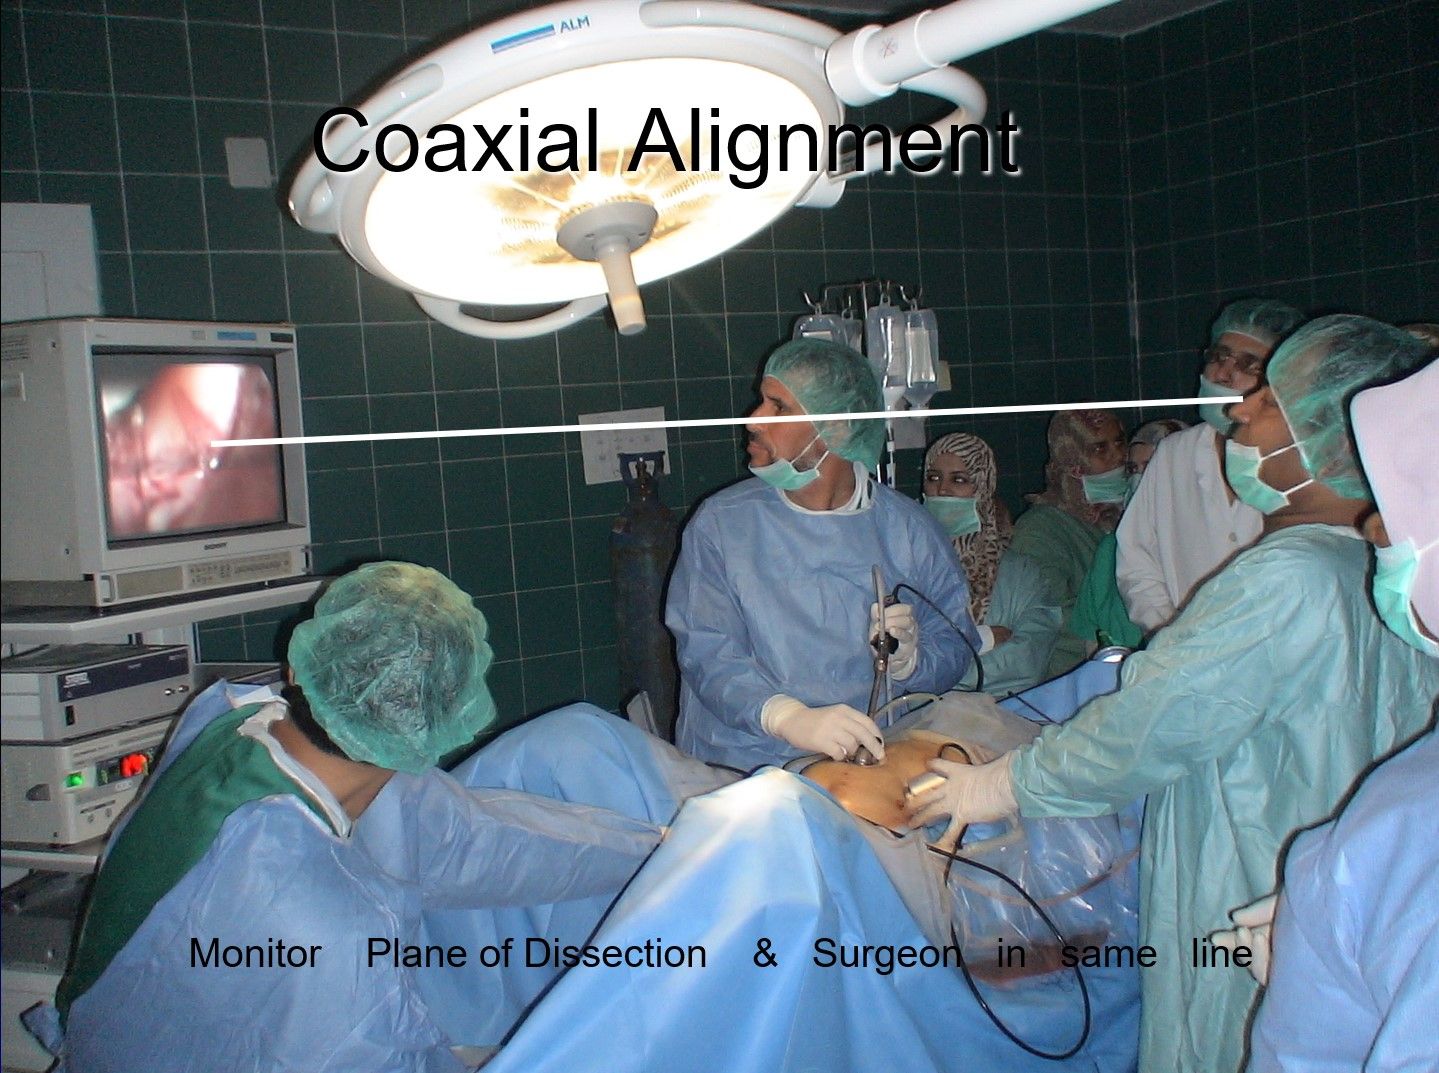
An organized well-equipped operation theater is essential for successful laparoscopy. The entire surgical team should be familiar with the instruments and their function. Each instrument should be inspected periodically for loose or broken tips even if the same instrument was used during a previous procedure. It is necessary to confirm the proper sterilization of instruments because the surgeon ultimately is responsible for the proper functioning of all instruments and equipment. The entire instrument should be placed according to the wish of the surgeon so that it should be ergonomically perfect for that surgery. The co-axial alignment should be maintained. Co-axial alignment means the eye of the surgeon, the target of dissection, and the monitor should be placed on the same axis.
Patient Position
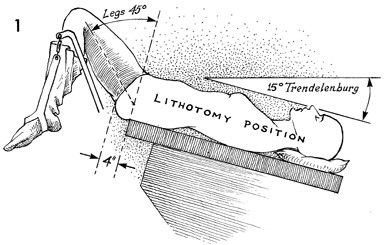
Initially, at the time of pneumoperitoneum by the Veress needle, the patient should be placed supine with a 15-degree head down. The benefit of this Trendelenburg’s position is that bowel will be pulled up and there will be more room in the pelvic cavity for safe entry of the Veress needle. It is important to remember that patient should be placed in a head-down position only if a surgeon is planning to insert a Veress needle pointing towards the pelvis cavity. If a surgeon is planning to insert the Veress needle perpendicular to the abdominal wall as in case of a very obese patient, previous midline incision or diagnostic laparoscopy in local anesthesia, the patient should be placed in supine position otherwise all the bowel will come just below the umbilicus and there is increased risk of bowel injury.
In gynecological laparoscopic procedures or if laparoscopy is planned to be performed together with hysteroscopy, the patient should be positioned in the lithotomy position and one assistant should be positioned between the leg of the patient. The patient’s leg should be comfortably supported by padded obstetric leg holders or Allen stirrups which minimizes the risk of venous thrombosis. In these procedures, the surgeon needs to use a uterine manipulator for proper visualization of female reproductive organs. The assistant seating between the legs of the patient will keep on watching the hand movement of a surgeon on the monitor and he should give traction with the handle of the uterine monitor in the appropriate direction. If thoracoscopy or retroperitoneoscopy is planned, then the patient is placed in a lateral position.
Patient position in Gynecological Laparoscopy
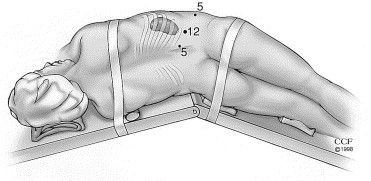
Patient position in retroperitoneoscopy
Position of Surgical Team
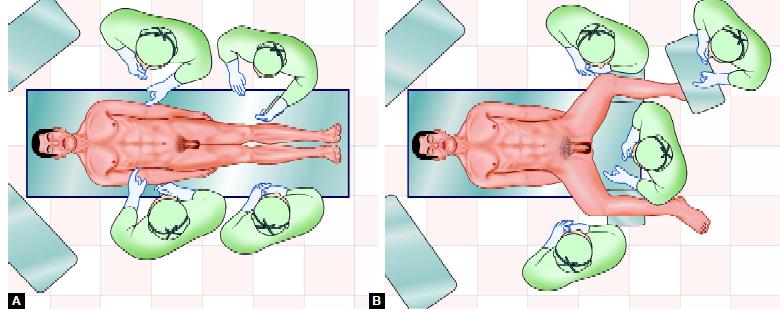
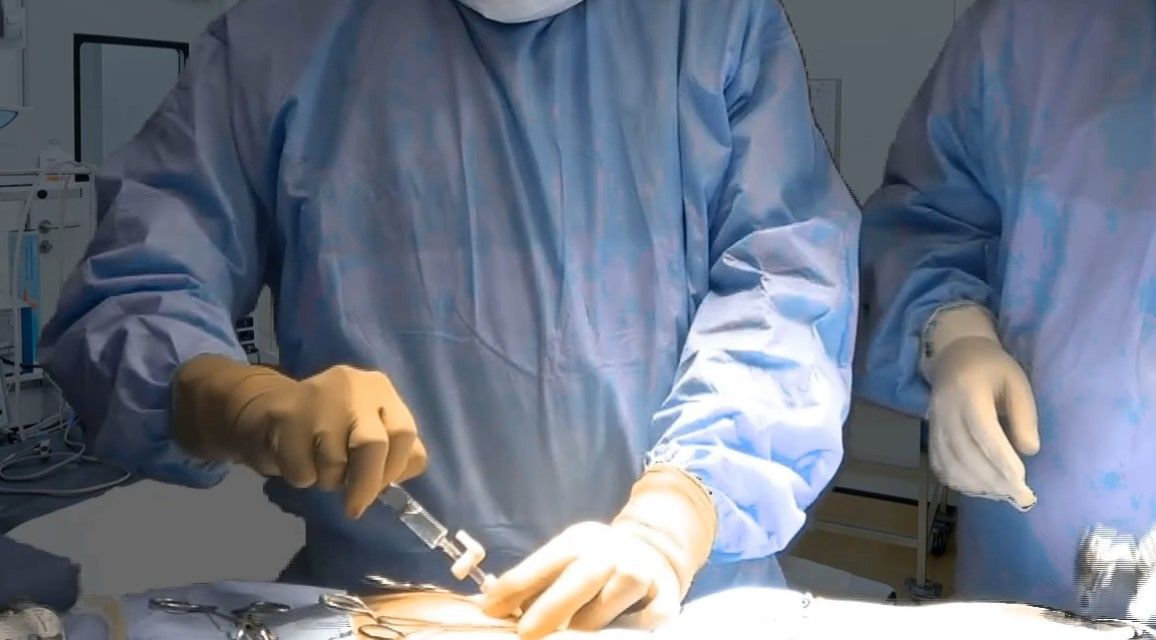
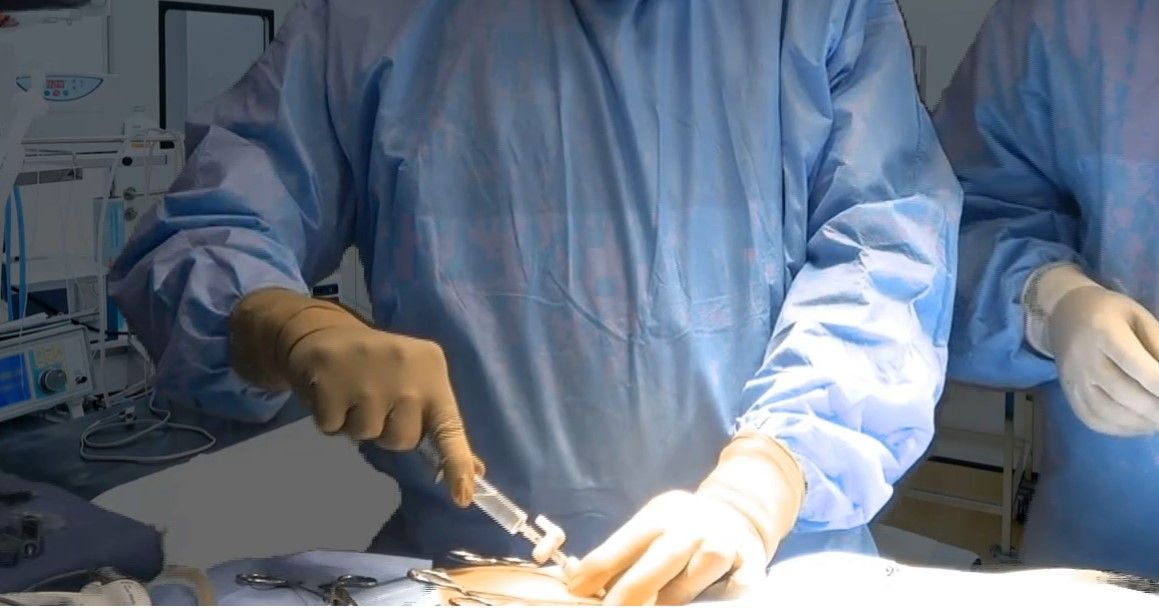
The laparoscopic surgeon is very much dependent and helpless with an eye fixed on the monitor. At the time of laparoscopic surgery, the surgeon is largely depending on his correct standing position. If the surgery is of the upper abdomen, French surgeons like to stand between the legs of the patient, popularly known as “French position”. The American surgeons like to operate from left in cases of upper abdominal surgery like cholecystectomy called “American position”.
It is not always wise to remain standing in any one fixed position and the surgeon can walk to the other side of the operation table to achieve proper ergonomics. In most of the cases at the time of initial access, a right-handed surgeon should stand on the left side of the patient so that he can hold the Veress needle with the right dominant hand. If the surgeon is left-handed, he should stand right to the patient at the time of access and insert the Veress needle or trocar with the left hand. This helps in inserting the Veress needle and trocar towards the pelvis by the dominant hand. Once the Initial Veress needle and first Optical trocar have been introduced surgeon should stand as opposed to the organ which he wants to operate on. Once all the ports are in position, the surgeon should come opposite to the side of pathology to start surgery and he should achieve co-axial alignment means Eye of the surgeon, Target of Dissection, and center of the monitor should be in one linear axis. In cholecystectomy, appendectomy right-sided hernia, or right ovarian cyst, the surgeon should stand left to the patient. In left-sided pathologies like a left ovarian cyst and left-sided hernia, it is ergonomically better for the surgeon to stand right to the patient.
American versus French position
In most of the upper abdominal surgery, the camera assistant should stand left to the surgeon, and in lower abdominal surgery, he or she should stand right to the surgeon. A camera assistant while holding a telescope can pass his or her hand between the body and arm of the surgeon so that some time surgeon can help him to focus his camera correctly. Camera assistant can be placed opposite the surgeon to stand but in this case, it is better to have two monitors on both the side of the patient, one for a surgeon and one for camera stand and other members of the surgical team. The surgeon should work in the most comfortable and less tiring position possible with shoulder relaxed, arms alongside the body, elbows at 90° angle, and forearm horizontal.
Preparation for Access
Before starting access, the abdomen should be examined for any palpable lump. It is wise to tell the patient to void urine before coming to the operating room but if the bladder is found full at the time of palpation. Foley’s catheter and a nasogastric tube should be applied once the patient is anesthetized. Remember that a full bladder or distended stomach may be injured very easily by a Veress needle or trocar.
The surgeon stands left to the patient in most of the right-sided pathology
Once the patient is cleaned painted and draped, all the connections should be attached, followed by focusing and white balancing of the camera. At the time of focusing, the distance between the gauge piece and tip of the telescope should be 6 to 8 cm.
Choice of Gas for Pneumoperitoneum
At first, pneumoperitoneum was created by filtered room air. Carbon dioxide and nitrous oxide are now preferred gas because of increased risk of air embolism with room air. Carbon dioxide is used for insufflation as it is 200 times more diffusible than oxygen and 20 times more absorbable than room air. It is rapidly cleared from the body by the lungs and will not support combustion. N2O is only 68 percent as rapidly absorbed in blood as CO2. N2O has one advantage over CO2 that it has a mild analgesic effect, and hence no pain if diagnostic laparoscopy is performed under local anesthesia. CO2 has the advantage of being non-combustible and allows the concomitant use of electrocoagulation and laser irradiation. For short operative procedures like sterilization or drilling, under local anesthetic N2O may also be used. During a prolonged laparoscopic procedure, N2O should not be a preferred gas for pneumoperitoneum because it supports combustion better than air. CO2 when it comes in contact with peritoneal fluid converts into carbonic acid. Carbonic acid irritates diaphragm causing shoulder tip pain and discomfort in the abdomen. Carbonic acid has one advantage also that it alters the pH of peritoneal fluid (acidotic changes) and it is a mild antiseptic, so the chances of infection may be slightly less compared to any other gas. Helium gas being inert in nature is also tried in many centers, but it does not have any added benefit over CO2. Helium may be a suitable alternative to carbon dioxide for creating pneumoperitoneum in patients with severe cardiorespiratory disease. Some of the studies suggest that pneumoperitoneum with helium will not be associated with profound circulatory depression or oxygen transport abnormalities. In addition, the use of helium is not associated with acid-base disturbances, although central venous filling pressures are similarly increased as with the use of CO2 pneumoperitoneum. However, helium is expensive gas and because of its low water solubility helium has a lower safety margin than carbon dioxide in the event of gas embolism.
Introduction of Veress Needle
To access the abdomen with a closed approach using a Veress needle:
• Apply two Ellis Forceps to evert the inferior crease of the umbilicus
• Give a 2 mm smiling incision in the skin and the subcutaneous tissue over the inferior crease of the umbilicus.
• Hold shaft of the Veress Needle as a Dart.
• Guard the length of the Veress needle needed to reach the peritoneal cavity.
• Place the needle through the incision to the level of the fascia
• Grasp and elevate the abdominal wall with your left hand. It is important to note that grasping only the skin while not including the fascia may increase the rate of the failed entry.
• Hold the Veress needle just over the previously incised site and insert it through the incision at a 45-degree angle towards anus but keep perpendicular to the abdominal wall. This can be only achieved by lifting the abdominal wall adequately by the left hand.
• While inserting the Veress needle feel for two "pops." The first occurs when the needle passes through the abdominal fascia and the second as it passes through the parietal peritoneum. More lateral access sites may have additional "pops" if more than one layer of fascia is traversed.
• As soon as the needle enters the peritoneal space, the displaced hub of the needle will "click" as the protective sheath recoils to cover the end of the needle. After entering an abdominal cavity, the intra-abdominal needle will also move more freely than a needle within the abdominal wall.
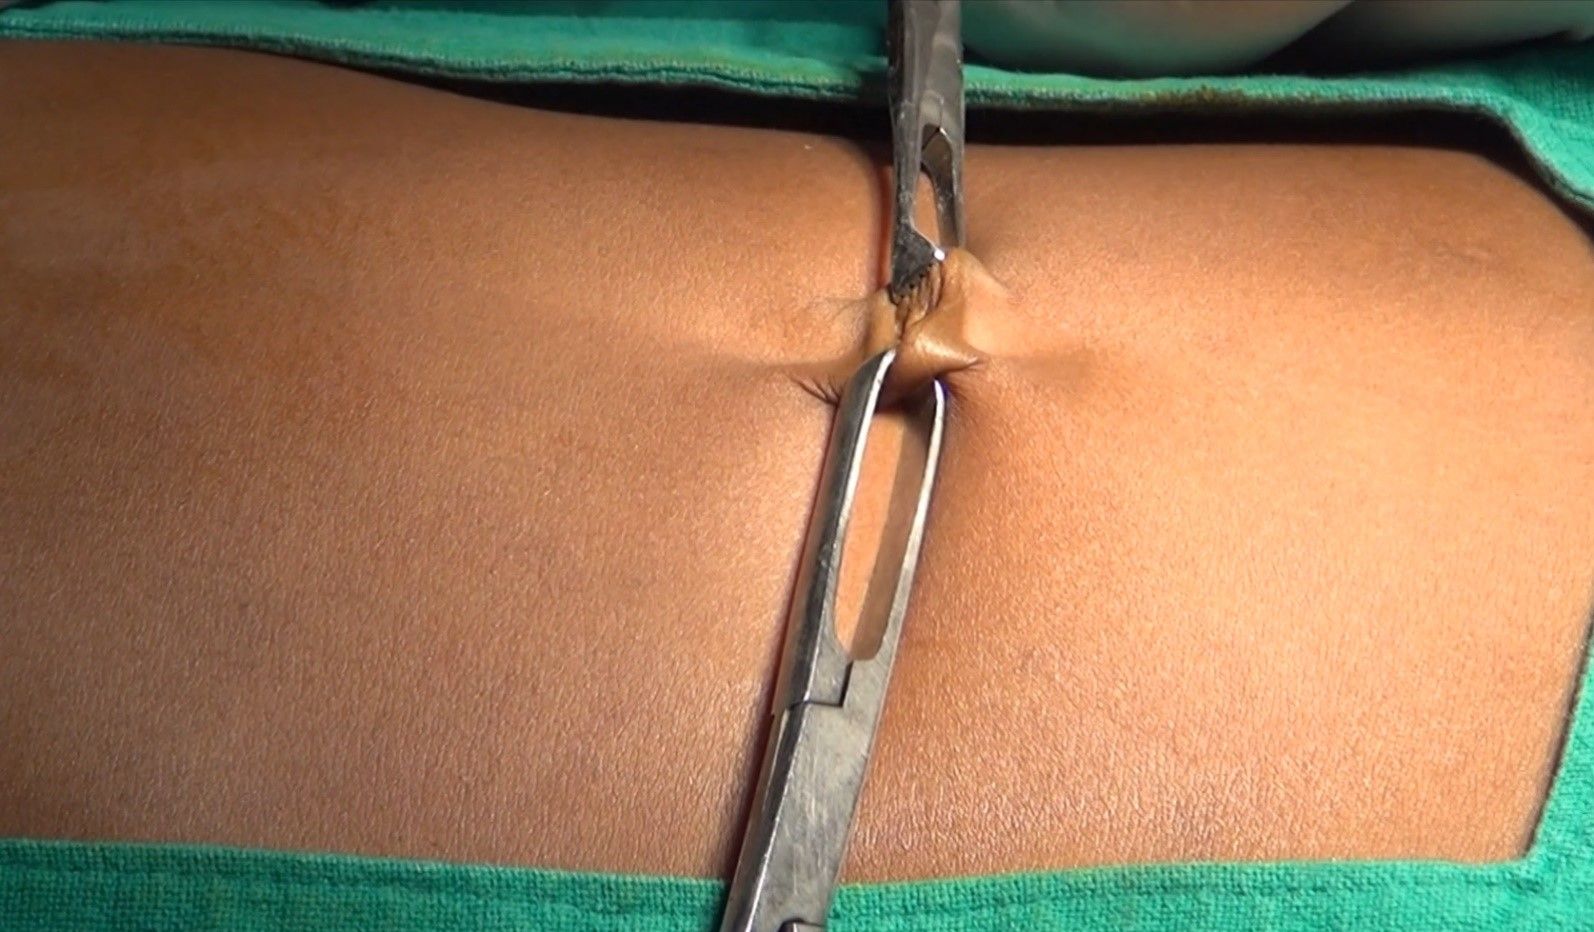
Two-Ellis Forceps is applied over the crease of umbilicus
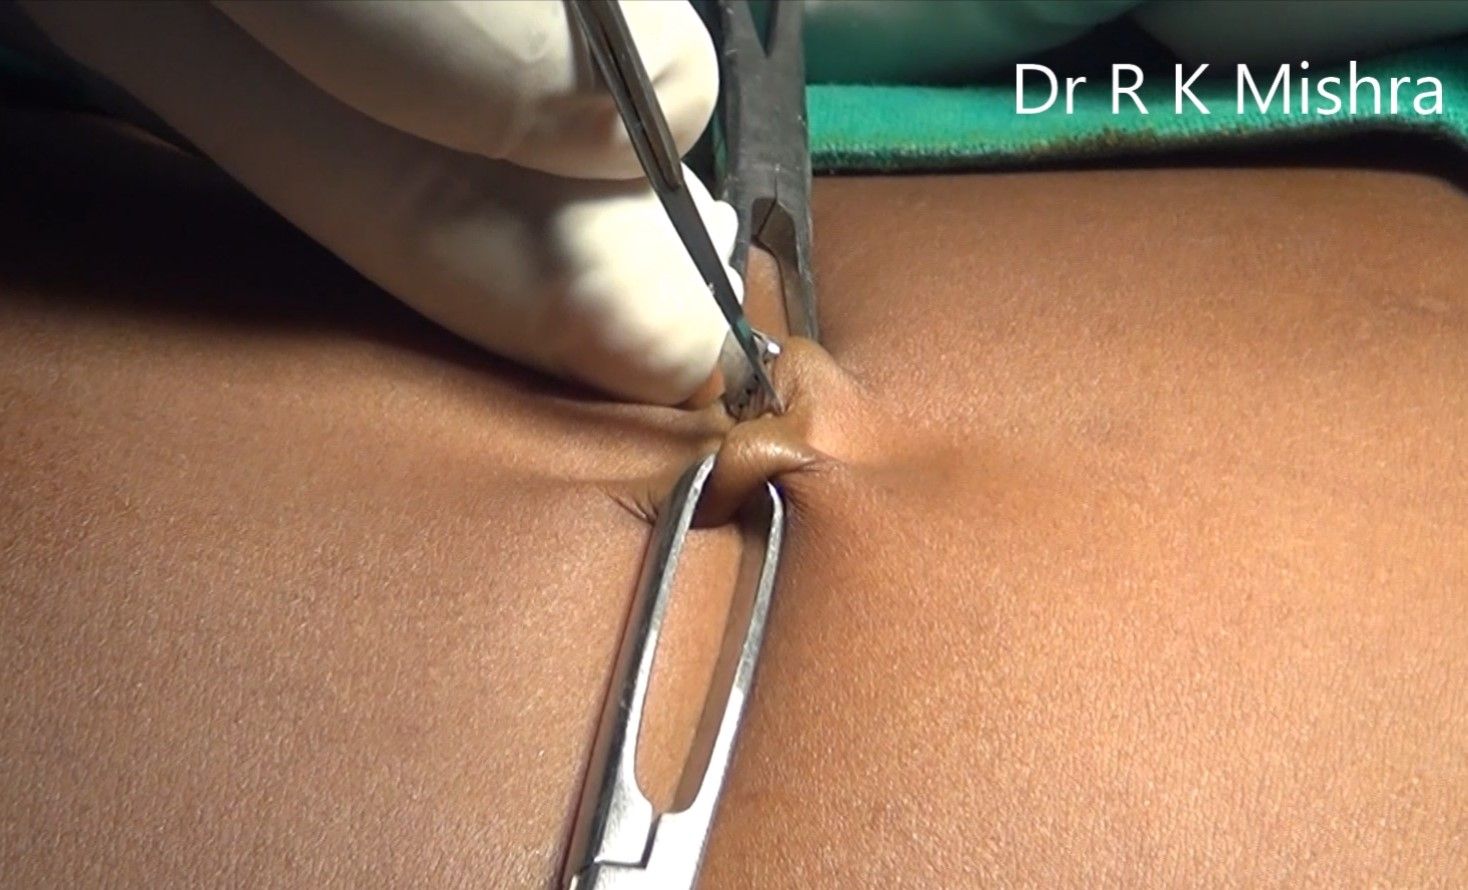
Two-millimeter stab wound over the inferior crease of umbilicus
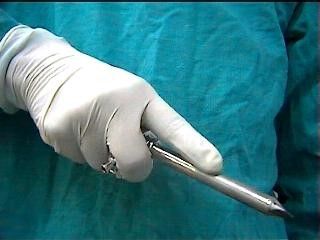
Veress needle should be held like a dart
Guard the required length of Veress Needle
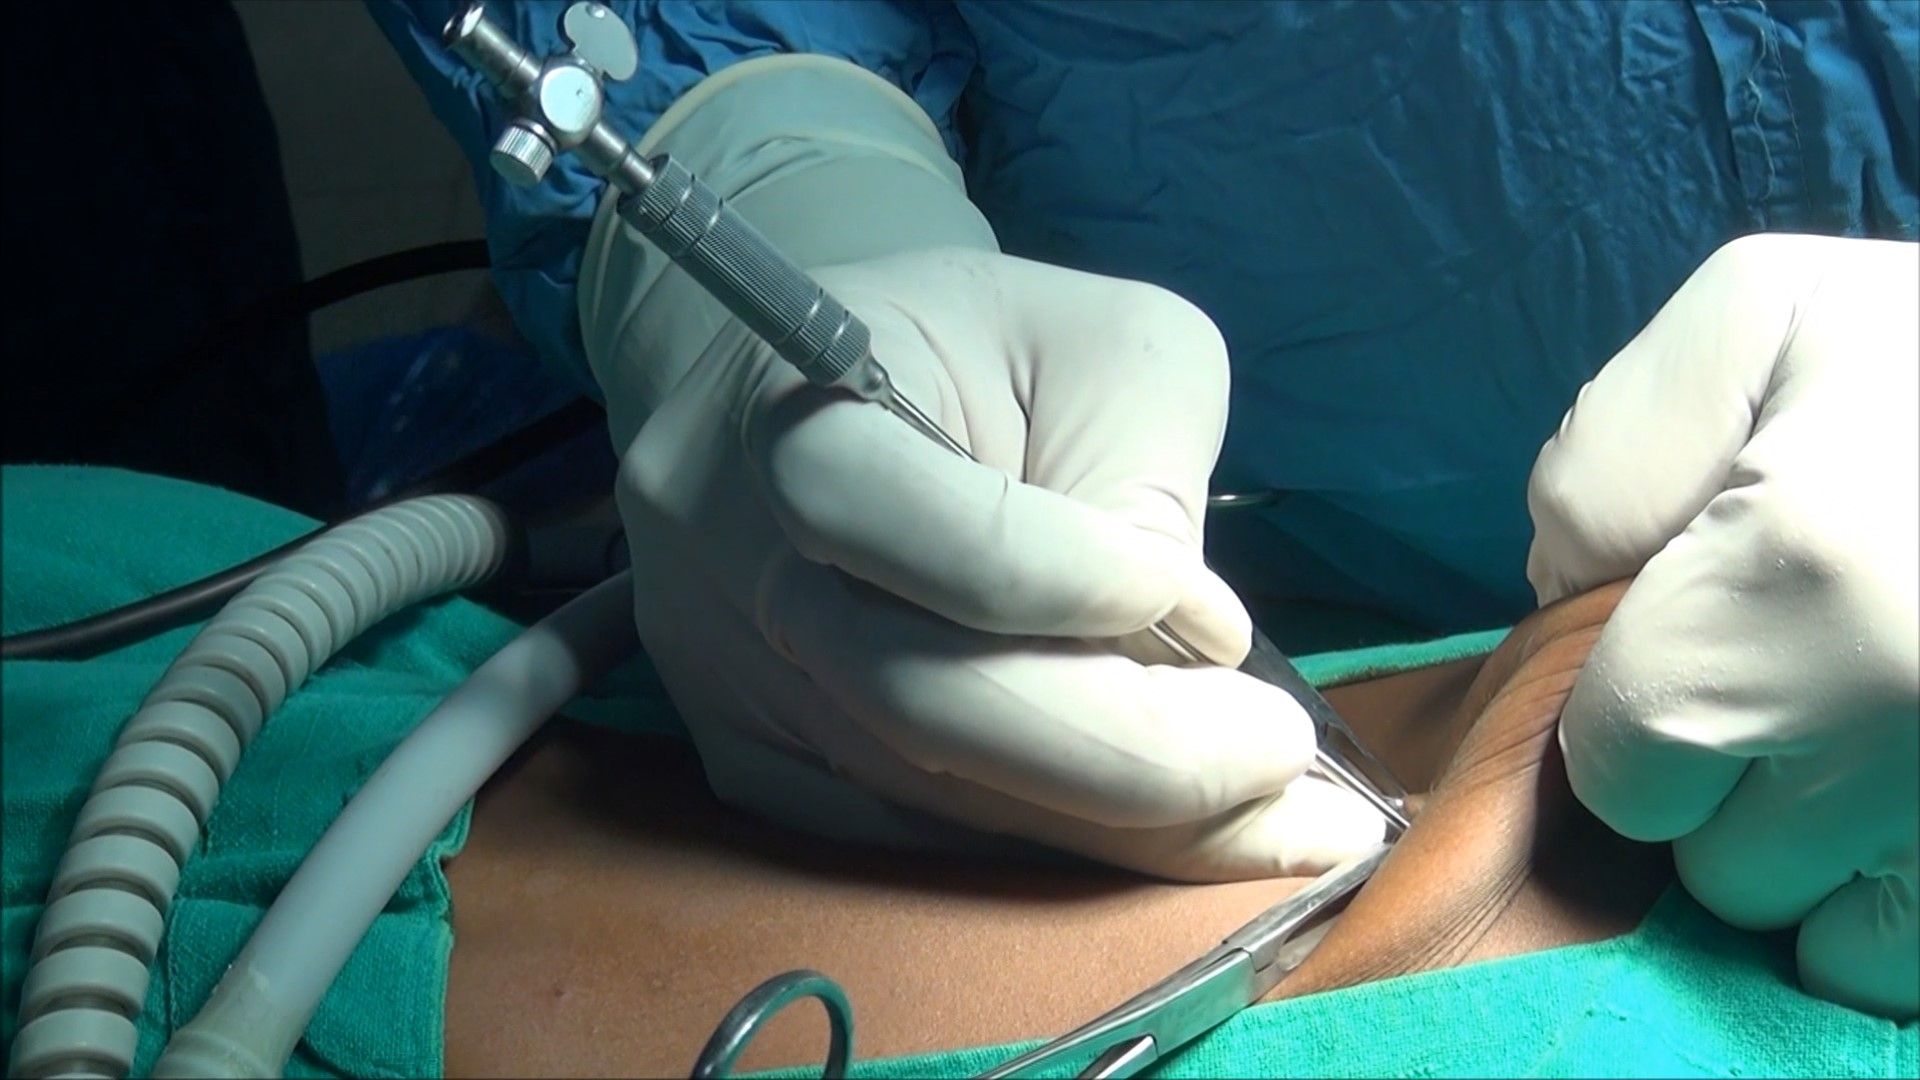
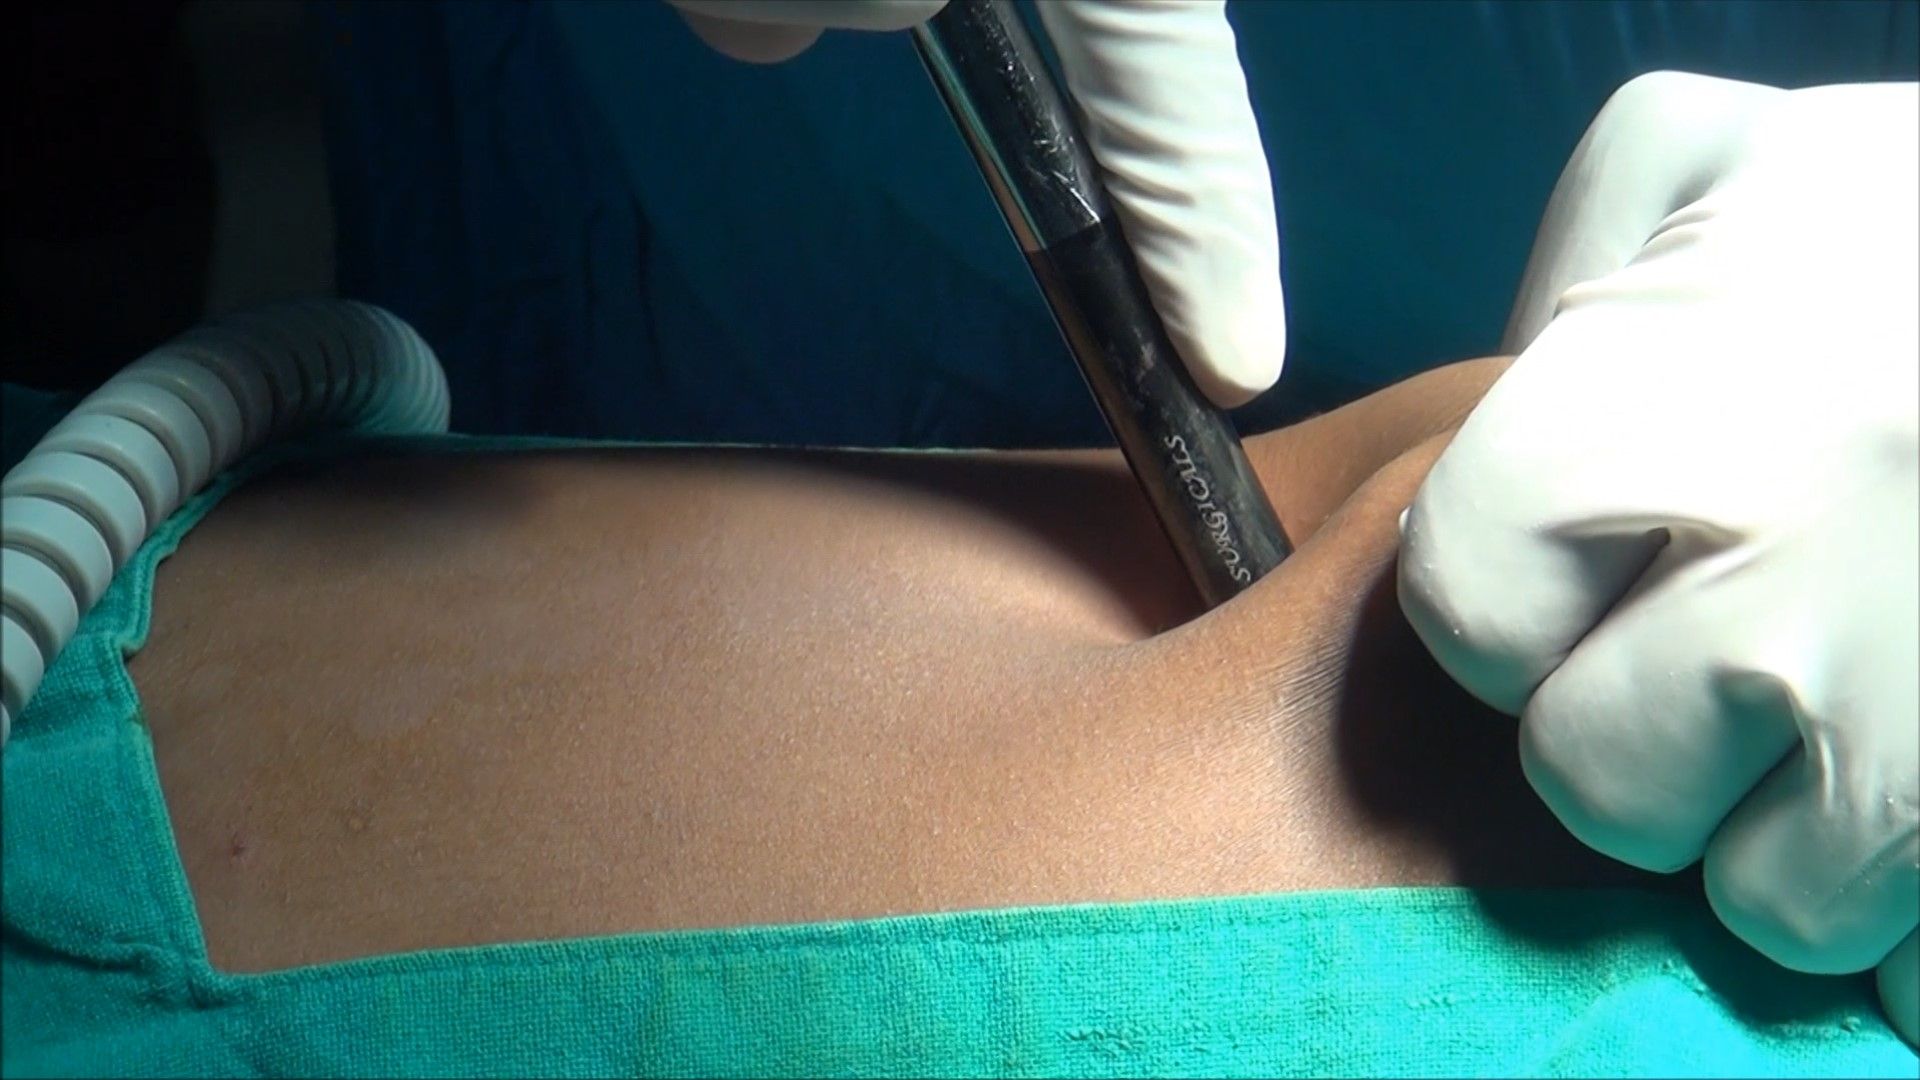
Veress needle should be pointed towards anus but perpendicular to the abdominal wall
Veress needle should be held like a dart. At the time of insertion, there should be a 45° elevation angle. The elevation angle is the angle between the instrument and body of the patient. To get an elevation angle of 45° the distal end of the Veress needle should be pointed toward the anus. To prevent the creation of a preperitoneal slip of tip of the Veress needle, it is necessary that the Veress needle should be perpendicular to the abdominal wall. However, there is a fear of injury of great vessels or bowel if the Veress needle is inserted perpendicular to the abdominal wall. To avoid both the difficulty (creation of preperitoneal space and injury to bowel or great vessels), the lower abdominal wall should be lifted in such a way that it should lie at 90° angle in relation to the Veress needle but in relation to the body of patient Veress needle will be at an angle of 45° pointed towards the anus. Lifting of the abdominal wall should be adequate so that the distance of the abdominal wall from the viscera should increase. If less than the required dose of muscle relaxant is given in muscular patients, lifting of the abdominal wall may be difficult. In multipara patients, lifting the lower abdominal wall is very easy.
Several tests are available for confirming the Veress needle placement. These include one of the following:
Needle Movement Test
Once the Veress needle is inside the abdominal cavity, the tip of the Veress needle should be free and if the surgeon will gently move the tip of the needle there should not be the feel of any resistance. It is very important to remember that the Veress needle should not be moved inside the abdominal cavity much, otherwise there is a risk of laceration of the bowel to be punctured.
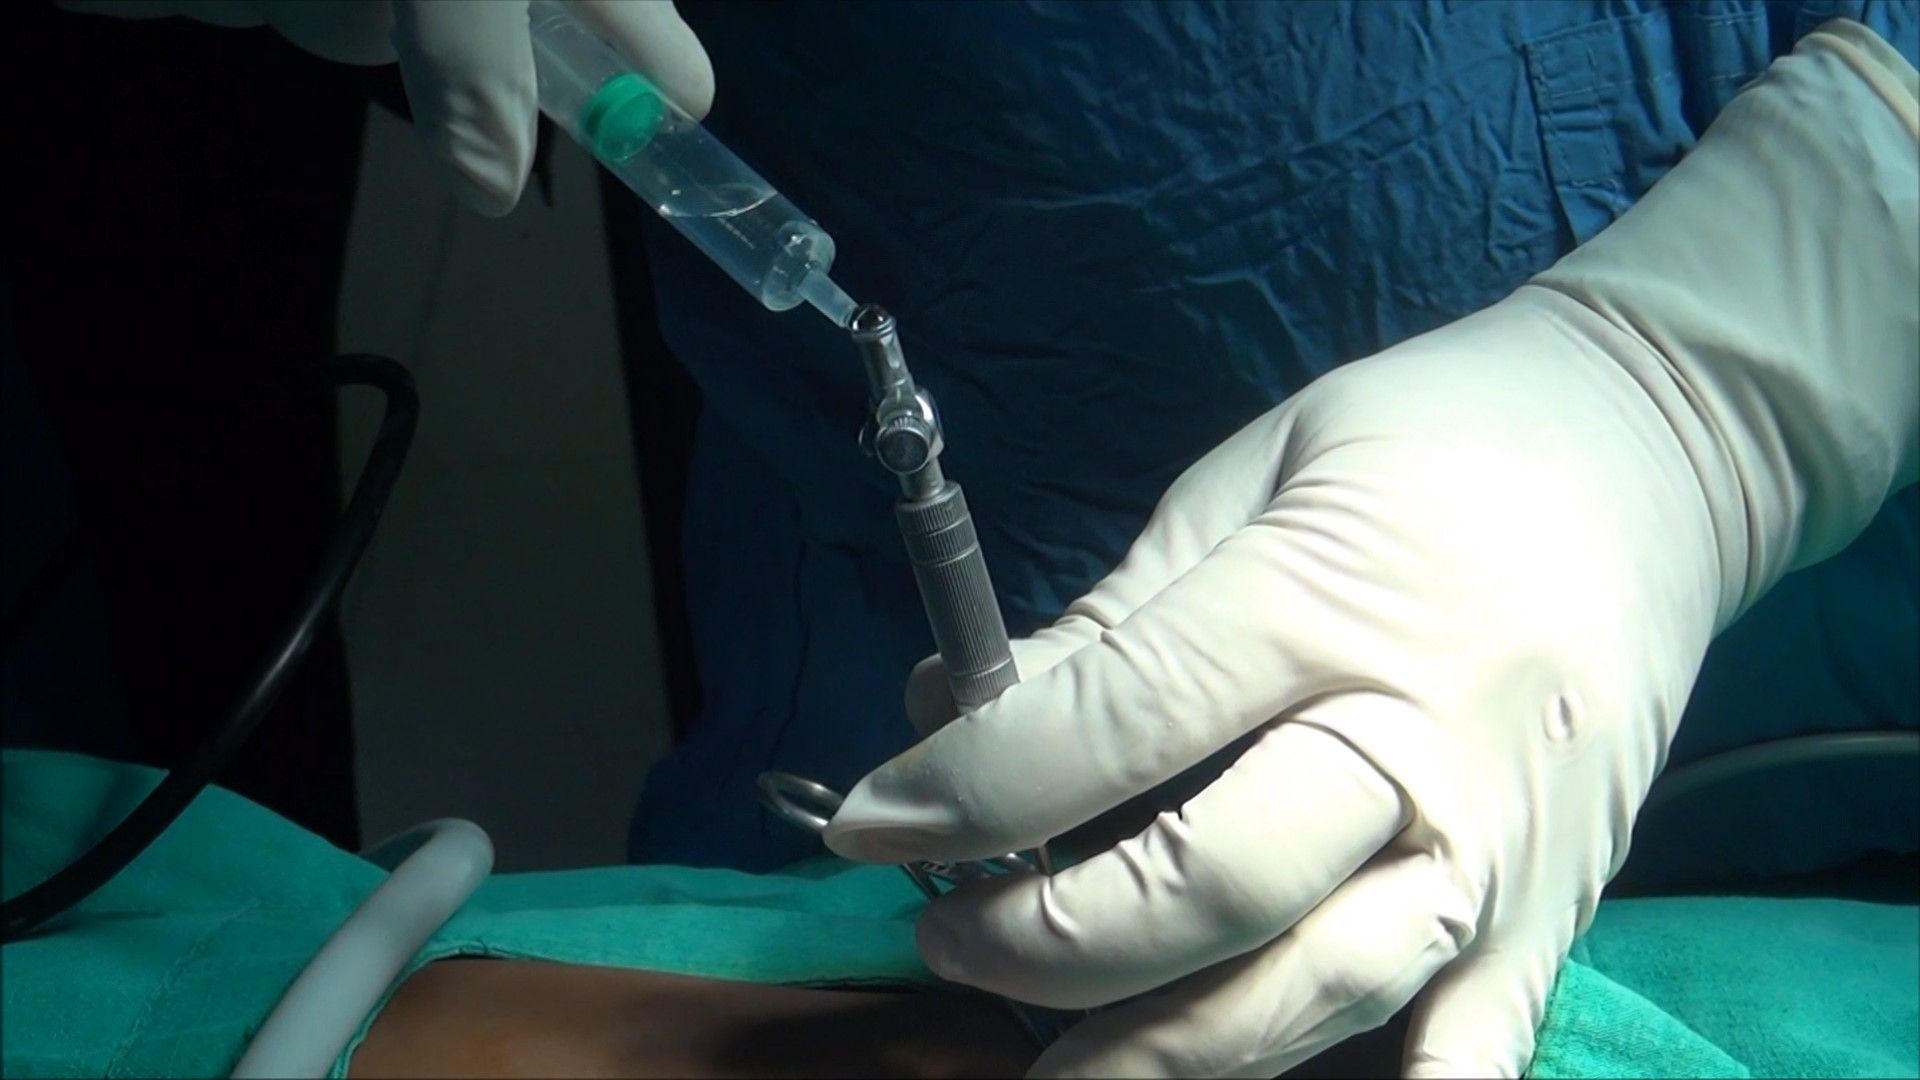
Irrigation Test
A 10 ml syringe should be taken in one hand and the surgeon should try to inject at least 5 ml of normal saline through the Veress needle. If the tip of the Veress needle is inside the abdominal cavity, there will be a free flow of saline otherwise some resistance is felt in injecting saline.
Irrigation test
Aspiration Test
After injecting saline, the surgeon should try to aspirate that saline back through the Veress needle. If the tip of the Veress needle is in the abdominal cavity, the irrigated water cannot be sucked. But if it is in pre-peritoneal space or in muscle fiber or above; the rectus the injected water can be aspirated back. In the aspiration test, if the more irrigated fluid is coming, then the surgeon should suspect ascites, some cysts, or perforation of the urinary bladder. If fecal matter is seen then perforation of bowel may be the reason and if blood is coming then the Vessel injury is the cause. If any fresh blood or fecal fluid is aspirated in the syringe surgeon should not remove the Veress needle and urgent laparotomy is required. Leaving Veress needle in position is helpful in two ways. First, it is easy to find the punctured area after laparotomy and secondly, further, bleeding will be less.
Aspiration test
Hanging Drop Test
Few drops of saline should be poured over the Veress needle and the abdominal wall should be lifted slightly if the tip of the Veress needle is inside the abdominal cavity the hanging drop should be sucked inside because, inside the abdomen, there is negative pressure. If the tip of the Veress needle is anywhere else the hanging drop test will be negative. Once it is confirmed that the Veress needle is inside the abdominal cavity the tubing of the insufflator is attached and flow is started.
Hanging drop test
Measurement of Intra-abdominal Pressure
Measure intra-abdominal pressure by attaching the Veress needle to the laparoscopic insufflator. An intra-abdominal position of the needle is suggested for intra-abdominal pressure ≤10 mmHg. In one large observational study, confirmation of low intraperitoneal pressure was the most reliable method to confirm Veress needle placement.
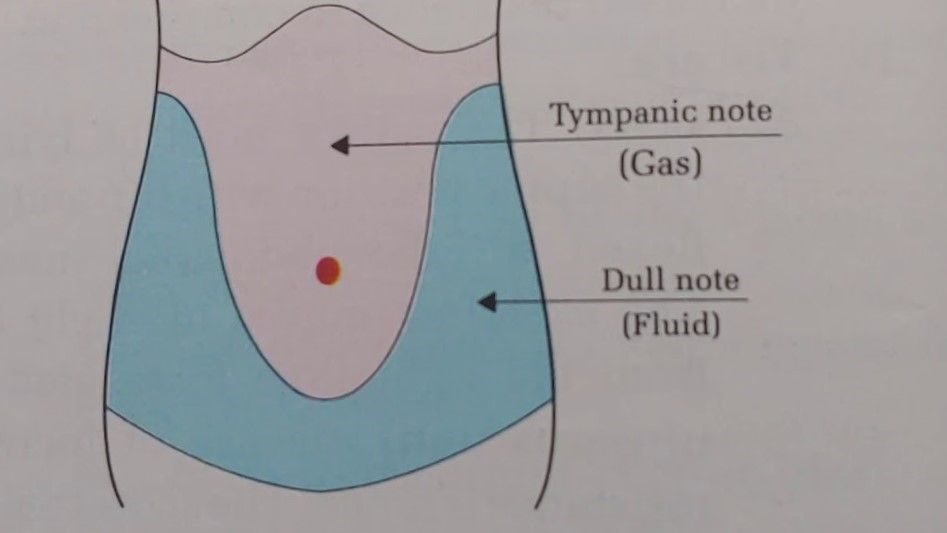
Once an intra-abdominal position of the needle is verified, initiate gas insufflation (typically carbon dioxide). A properly placed Veress needle will allow the free flow of gas. Tympany should be appreciated with the percussion of the abdomen in the right upper quadrant.
For many years, surgeons have been using a towel clip to elevate the abdominal wall. This towel clip technique of lifting the abdominal wall was advocated by Johns Hopkins University but after some time it was realized that the towel clip technique increases the distance of skin from the rest of the abdominal wall more than the distance of the abdominal wall from the viscera. The abdominal wall should be held full thickness with the help of the thenar, hypothenar, and all the four fingers. It is lifted in such a way that the angle between Veress needles to the abdominal wall should be 90° and the angle between the Veress needle and the patient should be 45°. At the time of the entry of Veress needle surgeon can hear and feel two click sounds. The first click sound is due to rectus sheath and the second click sound is due to puncture of the peritoneum. Anterior and posterior rectus forms one sheath at the level of the umbilicus, so there will be only one click for rectus.
If any other area of the abdominal wall is selected for access surgeon will get three click sounds. Once these two click sound is felt, the surgeon should stop pushing the Veress needle further inside and he should use various indicators to know how far he has accessed. Once the desired length of the Veress needle is introduced in the abdomen the tubing of the insufflator should be attached to the Veress needle. It is important to keep a nice hold on the Veress needle throughout while gas is flowing; otherwise, the Veress needle can slip out and may create preperitoneal insufflation.

Attaching gas tubing with a careful hold of Veress needle and counter twist over leur lock of insufflator tubing.
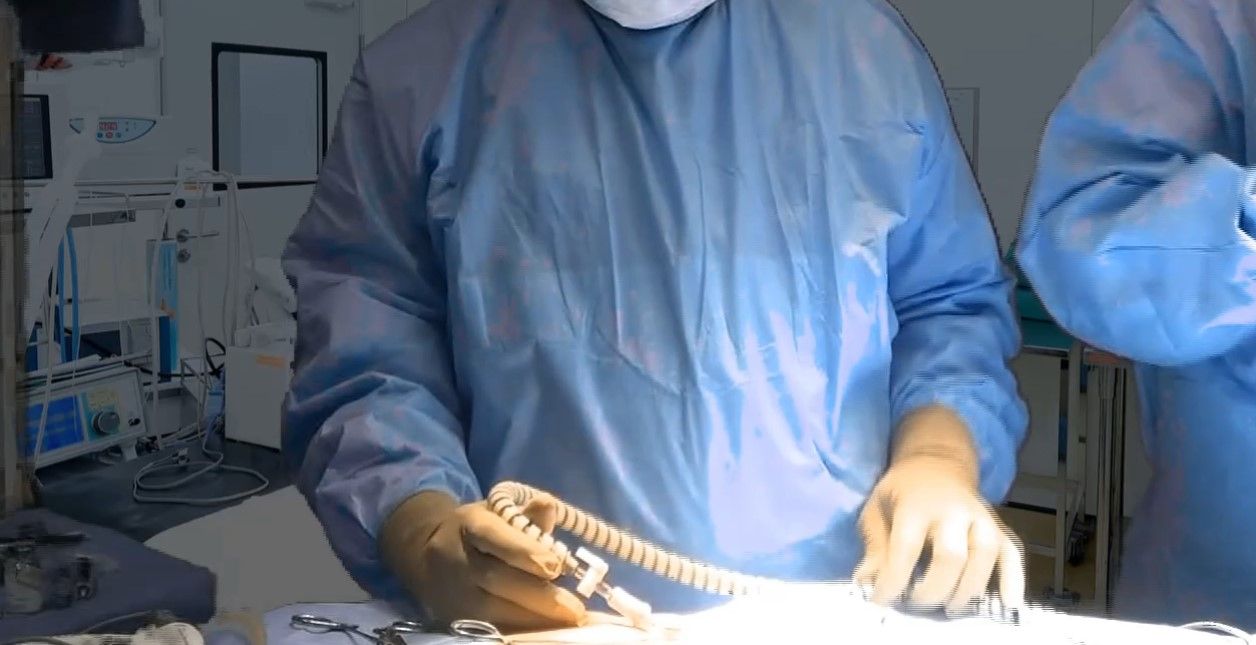
Beginning of insufflation with careful hold over Veress needle
Insufflation of Gas Test, Quadro-manometric Test
The tubing of the insufflator should be tightly attached with the help of a leur lock of the Veress needle. For safe access, the surgeon should always see carefully all the four indicators of insufflator at the time of the creation of pneumoperitoneum. If the gas is flowing inside the abdominal cavity there should be a proportionate rise in actual pressure with total gas used. Suppose only with the entry of 200 to 300 ml of gas, if actual pressure is equal to preset pressure of 12 mm Hg, that means gas is not going in the free abdominal cavity, it may be in pre-peritoneal space or inside omentum or may be in the bowel. If gas is flown more than 5 liters without any distension of abdomen that may be due to leakage or gas may be going inside the vessel.
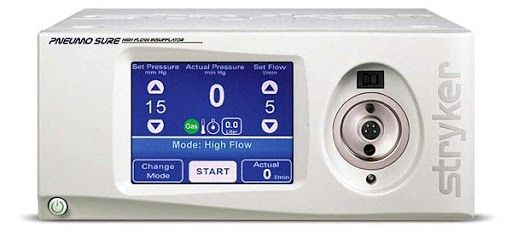
Quadro-manometric Indicators of Insufflator
Quadro-manometric indicators are the four important readings of the insufflator.
The insufflator is used to monitor:
• Preset insufflation pressure
• Actual pressure
• Gas flow rate
• Volume of gas consumed.
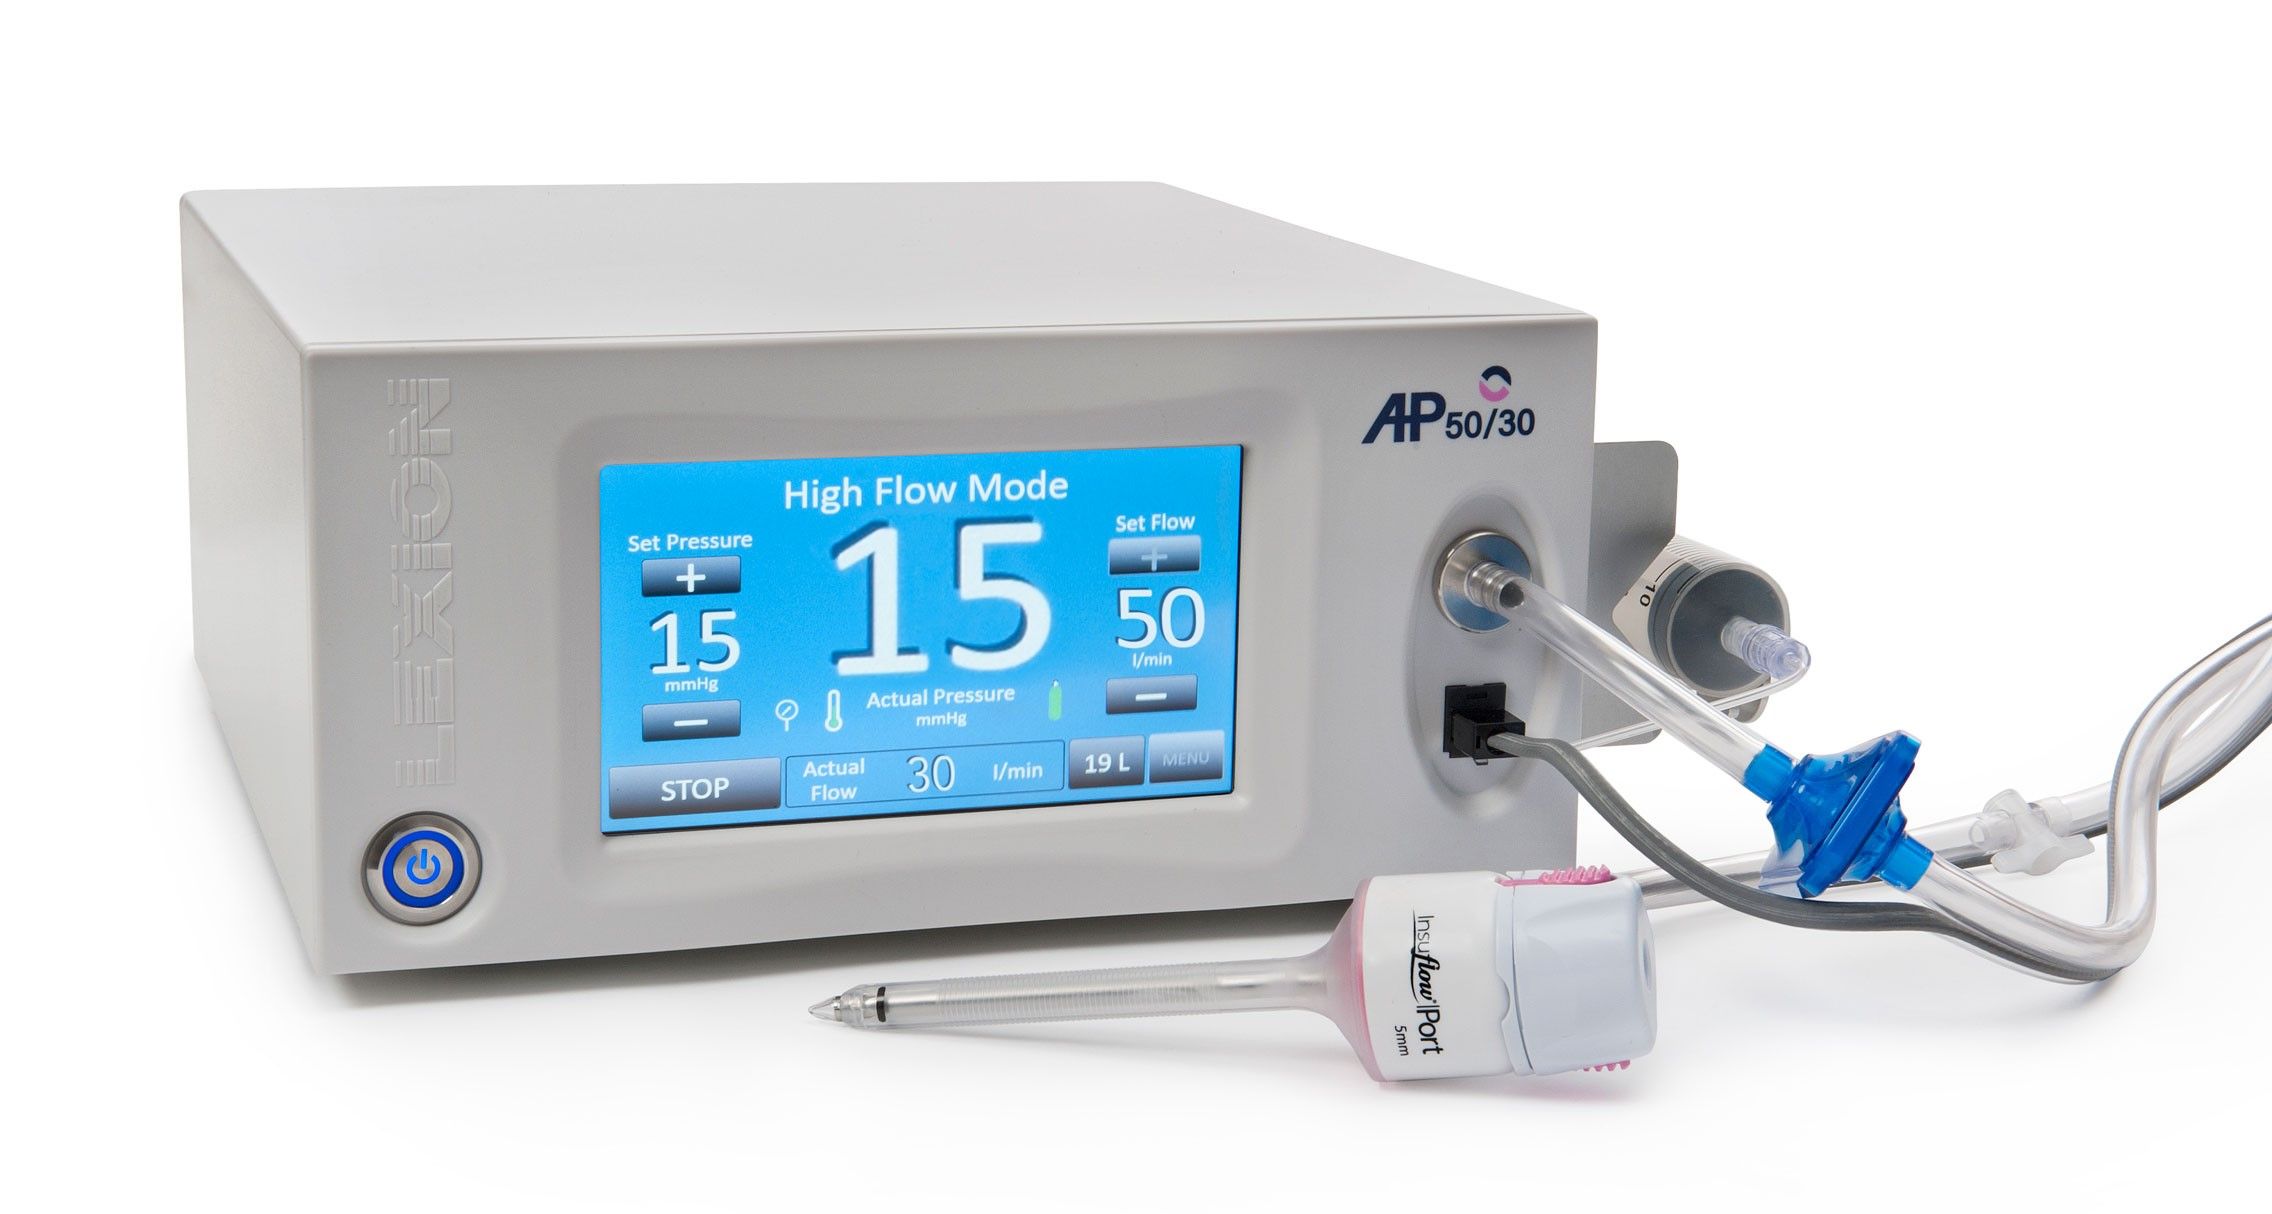
Quadro-manometric indicators
Preset Pressure
This is the pressure adjusted by the surgeon before starting insufflation. This is the command given by the surgeon to insufflator to keep intra-abdominal pressure at this level.
The preset pressure ideally should be 12 mm Hg. In any circumstance, it should not be more than 18 mm of mercury. Good quality insufflator always keeps intra-abdominal pressure at a preset pressure. Whenever intra-abdominal pressure decreases due to leaking of gas outside, insufflator ejects some gas inside to maintain the pressure, equal to a preset pressure. If intra-abdominal pressure increases due to external pressure; the insufflator sucks some gas from the abdominal cavity, to maintain the pressure to preset pressure. When a surgeon or gynecologist wants to perform diagnostic laparoscopy under local anesthesia, the preset pressure should be set to 8 mm Hg. In some special situations of axilloscopy or arthroscopy, we need to have pressure more than 19 mm Hg.
Actual Pressure
This is the actual intra-abdominal pressure sensed by the insufflator. When the Veress needle is attached, there are some errors in actual pressure reading because of the resistance of the flow of gas through the small caliber of the Veress needle. Since continuous flow of insufflating gas through a Veress needle usually gives an extra 4 to 8 mm Hg of measured pressure by insufflator, the true intra-abdominal pressure can be determined by switching the flow from insufflator off for a moment. Many microprocessors controlled good quality insufflators deliver a pulsatile flow of gas when the Veress needle is connected, in which the low reading of actual pressure measures the true intra-abdominal pressure. If there is any major gas leak, the actual pressure will be less, and the insufflator will try to maintain the pressure by ejecting gas through its full capacity. Actual pressures of more than 20 to 25 mm Hg has the following disadvantage over the hemodynamic status of the patient.
• Decrease venous return due to vena cava compression leading to:
– Increased chance of DVT (Deep vein thrombosis of calf)
– Hidden cardiac ischemia can precipitate due to decreased cardiac output
• Decrease tidal volume due to diaphragmatic excursion
• Increase risk of air embolism due to venous intravasation
• Increased risk of surgical emphysema.
Flow Rate
This reflects the rate of flow of CO2 through the tubing of the insufflator. When the Veress needle is attached the flow rate should be adjusted to 1 liter per minute. Studies were performed over an animal in which direct IV CO2 was administered, and it was found that the risk of air embolism is less if the rate is within 1 liter/minute. At the time of access using the Veress needle technique sometimes, the Veress needle may inadvertently enter inside a vessel but if the flow rate is 1 liter/minute there is less chance of serious complication. When initial pneumoperitoneum is achieved and the cannula is inside the abdominal cavity, the insufflators flow rate may be set at maximum, to compensate for the loss of CO2 due to the use of suction irrigation instrument. This should be remembered that if the insufflator is set to its maximum flow rate then also it will allow flow only if the actual pressure is less than preset pressure otherwise it will not pump any gas. Most of the surgeons keep initial flow rate with the Veress needle to 1 liter/minute and as soon as they confirm that gas is going satisfactorily inside the abdominal cavity by Percussion examination and seeing obliteration of liver dullness, then they increase the flow rate to 3 liters/minute. No matter how much flow rate you set for the Veress needle, the eye of the normal caliber Veress needle can give away CO2 flow at a maximum of 2.5 liters/minute. Once the cannula is in place flow rate can be increased but when the flow of CO2 is more than 10 liters/minute inside the abdominal cavity through the cannula and there is a leak, there is always a risk of hypothermia and dryness of intestine. To avoid this hypothermia in all modern microprocessor-controlled laproflattor, there is an electronic heating system that maintains the temperature of CO2.
Total Gas Used
As soon as 100 to 200 ml of gas is inside the abdominal cavity, the surgeon should do percussion of the right hypochondrium and liver dullness should obliterate with tympanic sound. This is the fourth indicator of the insufflator. Normal size human abdominal cavity needs 1.5-liter CO2 to achieve intra-abdominal actual pressure of 12 mm Hg. In some big size abdominal cavity and in multipara patients sometimes we need 3 liters of CO2 (rarely 5 to 6 liters) to get the desired pressure of 12 mm Hg. Whenever there is less or more amount of gas used to inflate a normal abdominal cavity, the surgeon should suspect some errors in the pneumoperitoneum technique. These errors may be leakage or may be preperitoneal space creation or extravasation of gas.
Tapping over right hypochondrium will demonstrate obliteration of liver dullness
Primary Trocar Insertion
Technical errors in the insertion of trocars after the creation of pneumoperitoneum are the most common causes of injury, resulting from inadequate stabilization of the abdominal wall, excessive resistance to trocar insertion, and excessive, misdirected, or uncontrolled force applied by the surgeon along the axis of the trocar. It is important to stabilize the abdominal wall by full insufflation, complete muscle relaxation, to increase the distance between the anterior abdominal wall and the retroperitoneal vessels and the abdominal organs. It is important to ensure that the skin incision is of enough length and that the reusable trocar tip is sharp so that no resistance is offered.
Trocar and cannula design currently available have several basic features in common. They come in a variety of sizes and the central trocar may have a pyramidal, conical or rounded tip. They have a valve system and a gas input with a tap. These cannulas have a flap, bicuspid or magnetic valves, and care should be taken when passing a telescope through the port that lens of telescope should not hit the valve otherwise it can be damaged. Some disposable cannula has a safety system with a cylinder jumps forward after penetration of the abdominal wall and forms a shield over the sharp trocar tip. This is not foolproof due to shield lag. In the most recent disposable cannula, the trocar itself is spring-loaded. Few optical trocars are also available which has been discussed in the instrument design section of this book.
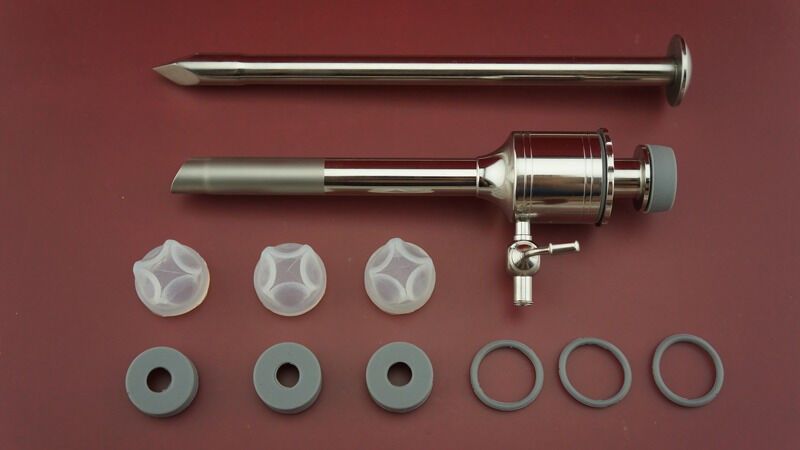
Reusable Trocar and Cannula
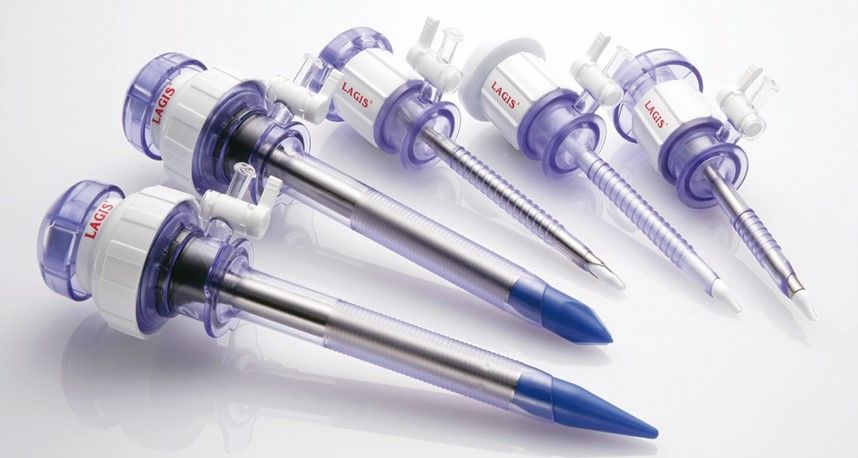
Disposable Trocar and Cannula
The first trocar and cannula inserted are usually 11 mm in diameter. This will accommodate a 10 mm telescope and leave enough space in the cannula for rapid gas insufflation if required.
Steps of Primary Trocar Insertion
Patient Position
As for the Veress needle insertion, the patient should be placed supine with 10 to 20 degrees head-down. The cephalocaudal relationship between the aortic bifurcation and the umbilicus has been studied radiologically. The umbilicus is often located directly above or cephalad to the aortic bifurcation and is consistently located cephalad to where the left common iliac vein crosses the midline. The aortic bifurcation is located more caudal to the umbilicus in the Trendelenburg’s position than in the supine position.
Site
The same site of Veres's needle entry should be used for primary trocar insertion. The inferior or superior crease of umbilicus can be used in average built patient and transumbilical incision can be used in an obese patient. Before the introduction of a trocar, the surgeon should confirm pneumoperitoneum. After adequate distention of the abdominal cavity, the actual pressure should be equal to the preset pressure and gas flow should be stopped.
Before the introduction of the trocar, the initial 2 mm stab puncture wound of skin for the Veress needle should be extended to 11 mm. It should be remembered that the most common cause of forceful entry inside the abdominal cavity with primary trocar is small skin incision. To avoid inadvertent injury of the bowel due to forceful uncontrolled entry, the incision of skin should not be less than 11 mm in size. The skin incision for trocar should be smiling in shape (U shaped) along the crease of the umbilicus to get a better cosmetic value. After giving an 11 mm incision with 11 number blades, the surgeon should spread fatty tissues with Kelly clamp or mosquito forceps. This will also dilate the obliterated vitello-intestinal duct which was demonstrated first time by Scandinavian surgeons so it is called the Scandinavian technique.
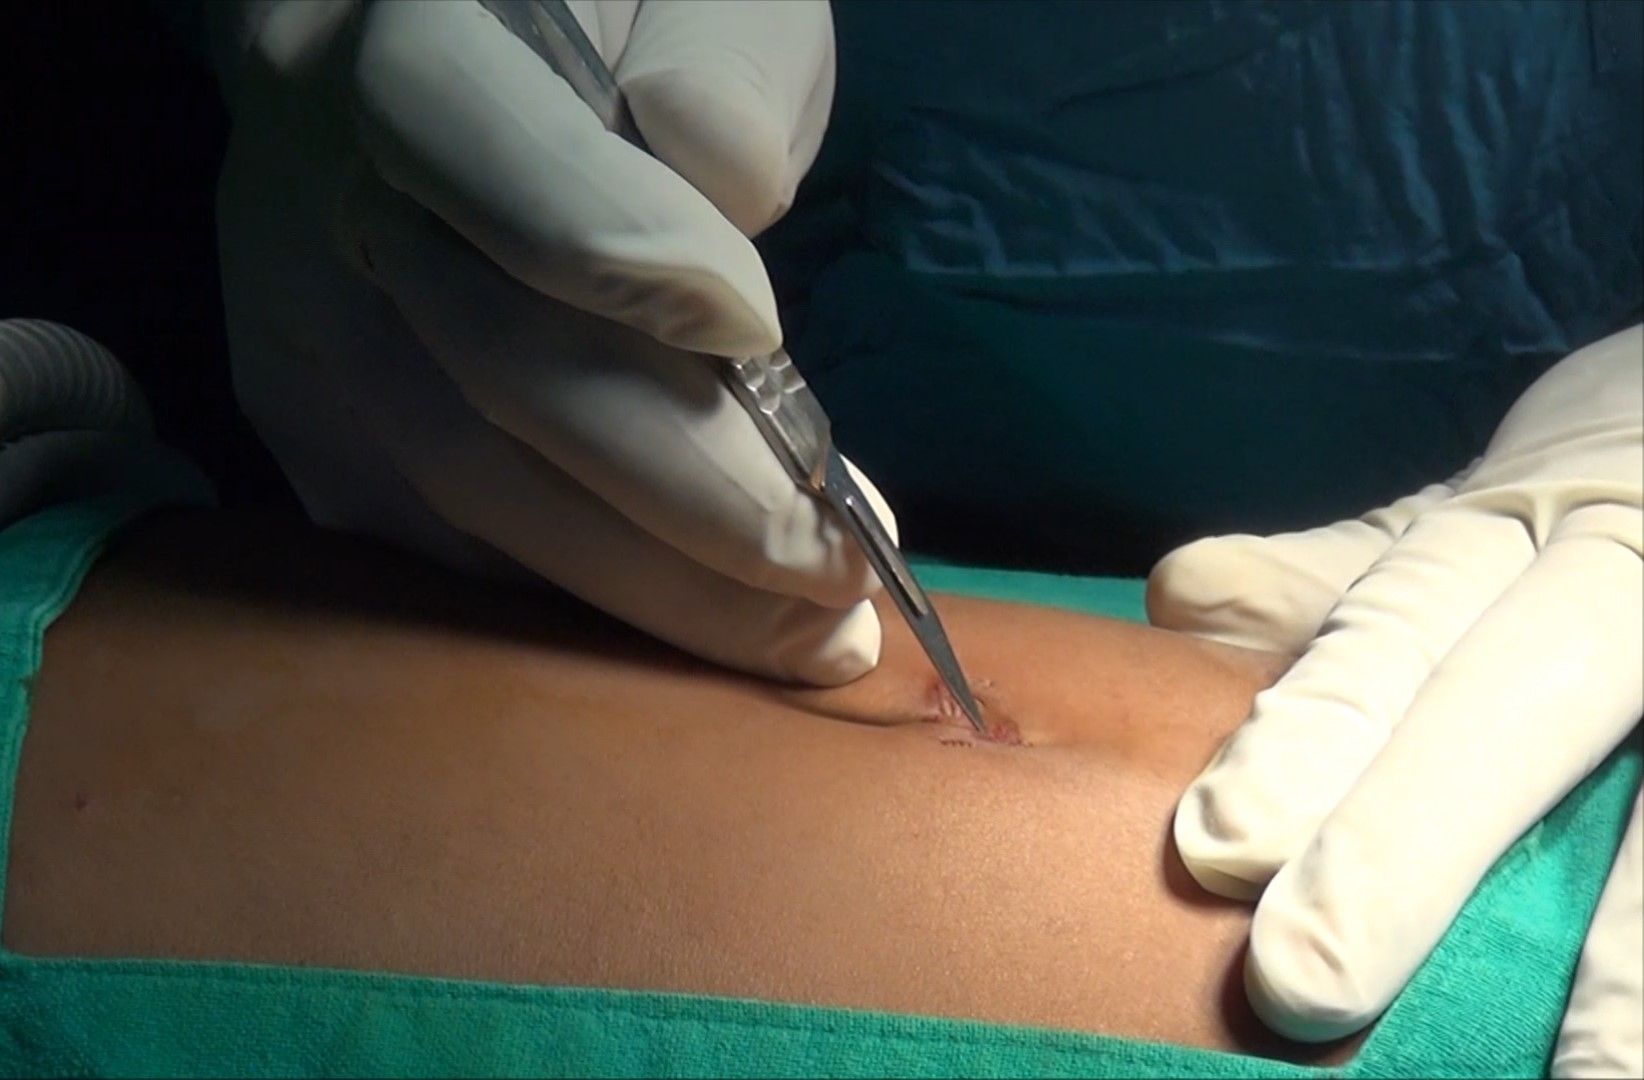
2 mm stab wound should be extended to 11 mm
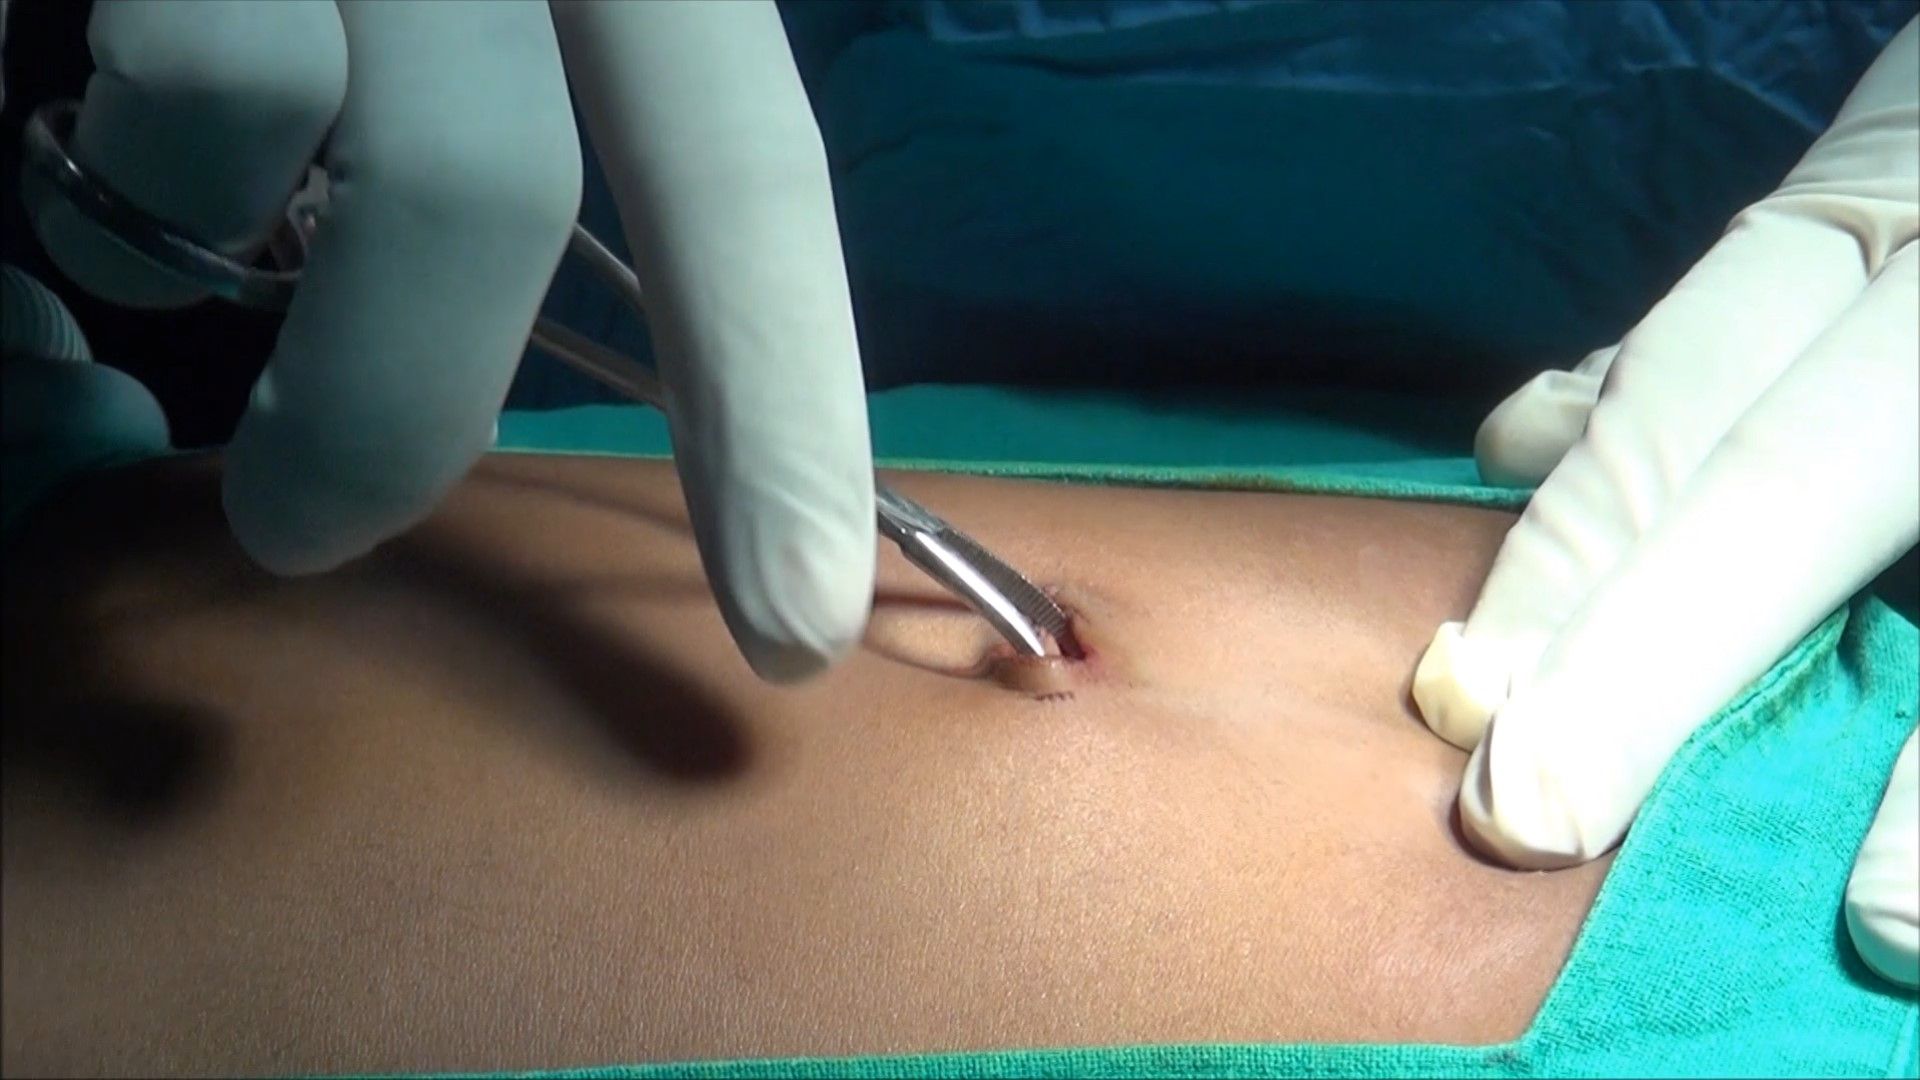
Mosquito forceps tip introduced through a stab wound
Introduction of Primary Trocar
A surgeon should hold the trocar in a proper way. Head of the trocar should rest on thenar eminence, middle finger should encircle air inlet and index finger should point toward the sharp end. After holding the trocar properly in hand, the full thickness of the abdominal wall should be lifted by fingers thenar and hypothenar muscles. After the creation of pneumoperitoneum lifting of the abdominal wall is difficult because it slips. To overcome this, it should be grasped to counter the pressure exerted by the tip of the trocar.
The trocar and cannula should be held like a pistol
Angle of Insertion
Initially, the angle of insertion for primary trocar should be perpendicular to the abdominal wall but once the surgeon feels giving way sensation, the trocar should be tilted to 60 to 70° angle. Insertion of trocar should be in screwing fashion in case of a pyramidal trocar. In disposable bladed trocar screwing the trocar should not be done.
Insertion of trocar by screwing fashion
Confirmation of Entry of Primary Trocar
• Audible click if disposable trocar or safety trocar is used.
• Whooshing sound if the reusable trocar is used (gas passes from the small hole at the tip of the pyramidal-shaped trocar to the head of the trocar).
• Loss of resistance felt both in disposable as well as a reusable trocar.
Once the trocar entry in the abdominal cavity is confirmed, the cannula is stabilized with the left hand, and the trocar is removed by the right hand. After removing the trocar, the cannula is pushed slightly further inside the abdominal cavity to prevent the coming cannula in preperitoneal space with the movement of the abdominal wall with respiration. Once the cannula is in place tubing of insufflator is attached again and flow is restarted to refill the CO2 at a preset pressure. The telescope is introduced slowly keeping the oblique cut edge down in case of a 30-degree telescope. At the time of the introduction of a telescope, it is wise to keep the valve of the cannula open to prevent scratch over the tip of the telescope.
Once the telescope is inside, the elevation angle of the telescope should be 90° with a panoramic vision. The site just below the entry of the primary port is examined for any vessel or bowel injury. Sometime, there may be few drops of blood found just below the site of entry but these few drops of blood is trickled blood through umbilical wound. If the surgeon has any doubt about perforation of bowel or injury to the vessel, he should evaluate this area again after putting other ports.
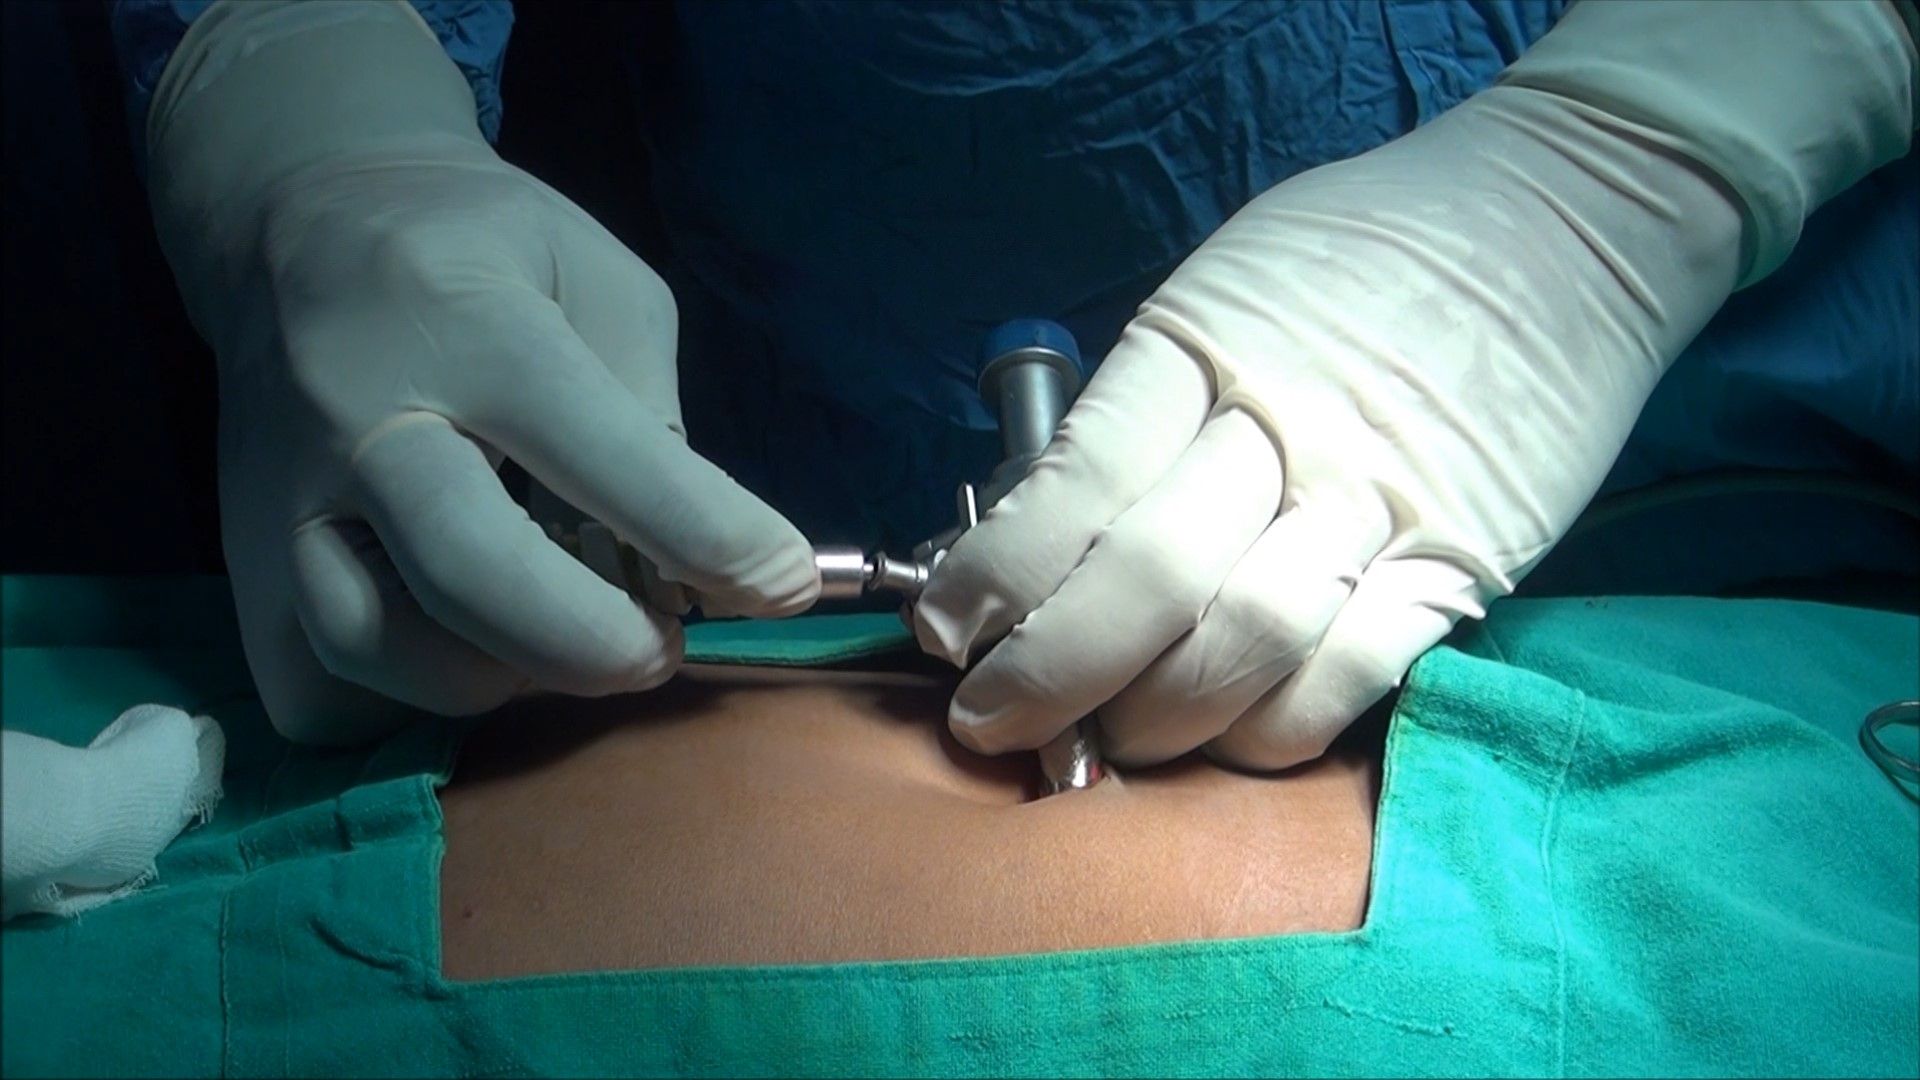
Insufflator Tubing in reattached once the optical port is introduced
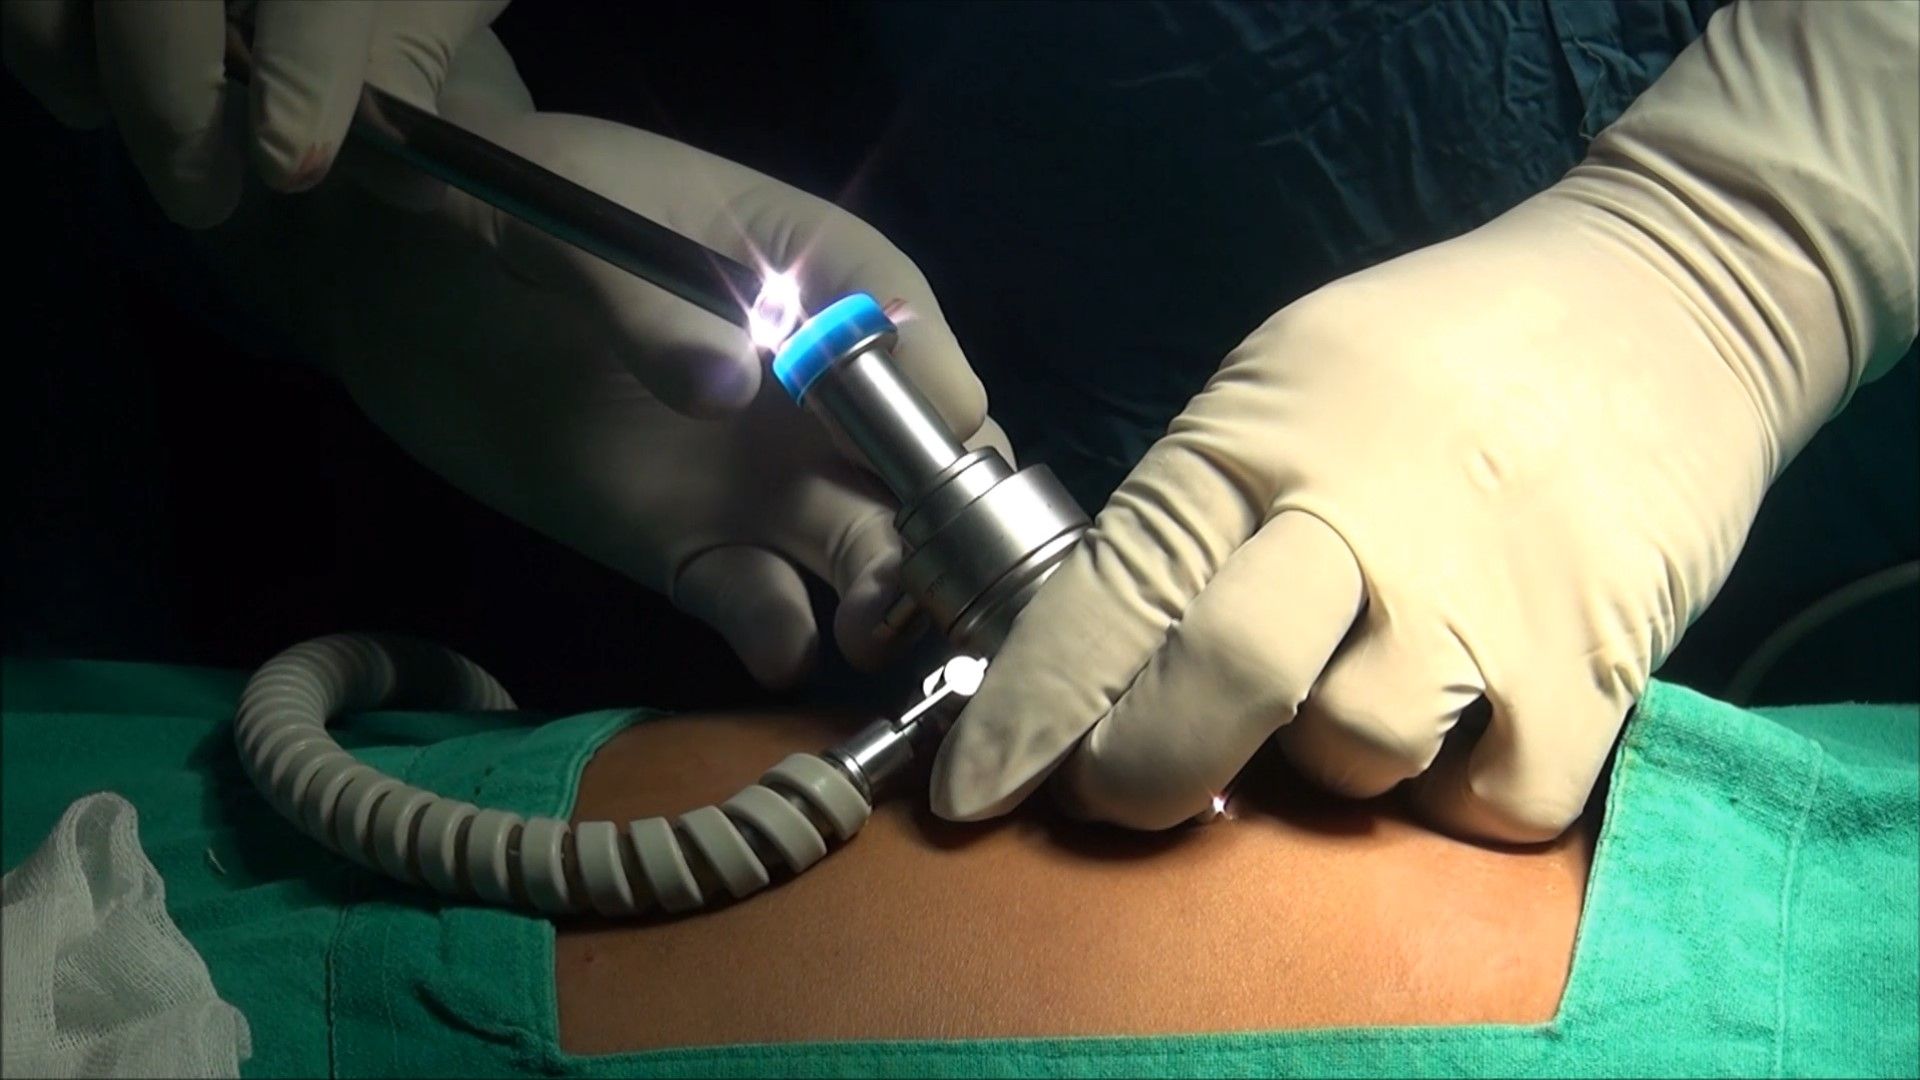
Introduction of the telescope
Initial diagnosis of injury after access
Working Ports
To select the site for a secondary port, transillumination with an illuminated telescope tip should be done first to locate the avascular area to avoid injury of subcutaneous vessels. With the help of mosquito forceps, any remaining skin fiber is breached, and the subcutaneous fat should be cleared. Initially, the direction of entry of trocar is perpendicular but as soon as the tip of the trocar is seen, the direction of the trocar should be changed towards the free space to prevent any injury of underlying viscera.
Introduction of Secondary port
Subsequent Ports
Subsequent trocars are inserted under direct vision at locations appropriate for the procedure and to the anatomy of the individual. If the port is on the opposite side of the patient, it can be introduced the same way but if the surgeon is not able to bend enough to the opposite side, his right index finger can be placed over the head of the trocar and left hand should guard the shaft of the cannula. Alternatively, trocars of the opposite side can be introduced by the assistant. With the slow rotatory movement of the right hand, first, the tip of the trocar should be perpendicular to the skin but as soon as the tip of the trocar is seen the direction of the trocar should change towards the anterior abdominal wall. Alternatively, the surgeon can go to another side of the patient and he can introduce the trocar in a conventional way.
In the same manner, all the working port should be introduced, and instruments are inserted to start the surgery. It should be remembered that the distance between the two ports should never be less than 5 cm. The “Baseball diamond concept” discussed in the next chapter is the most appropriate method to decide the site of the introduction of the working port. The positioning of operative ports is an important factor in determining the ease with which a procedure is carried out. It is a skill that must be learned.
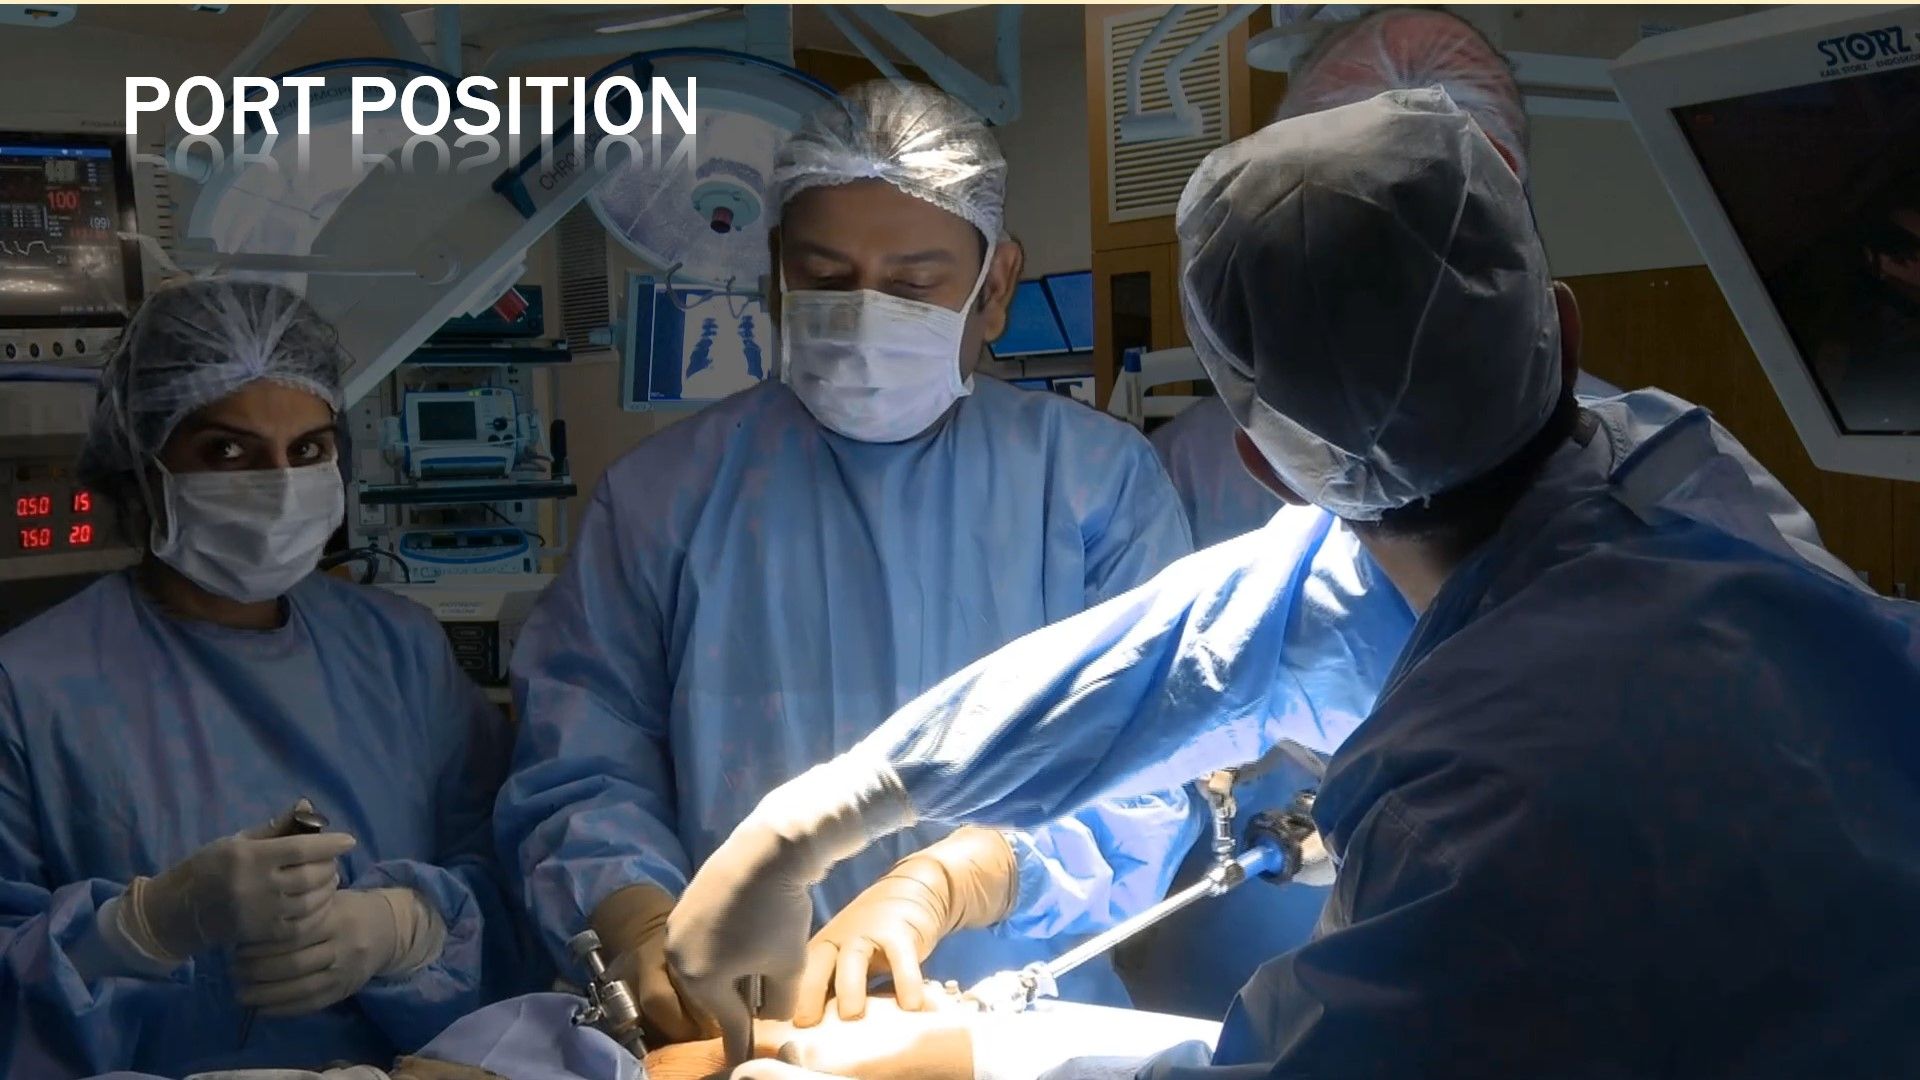
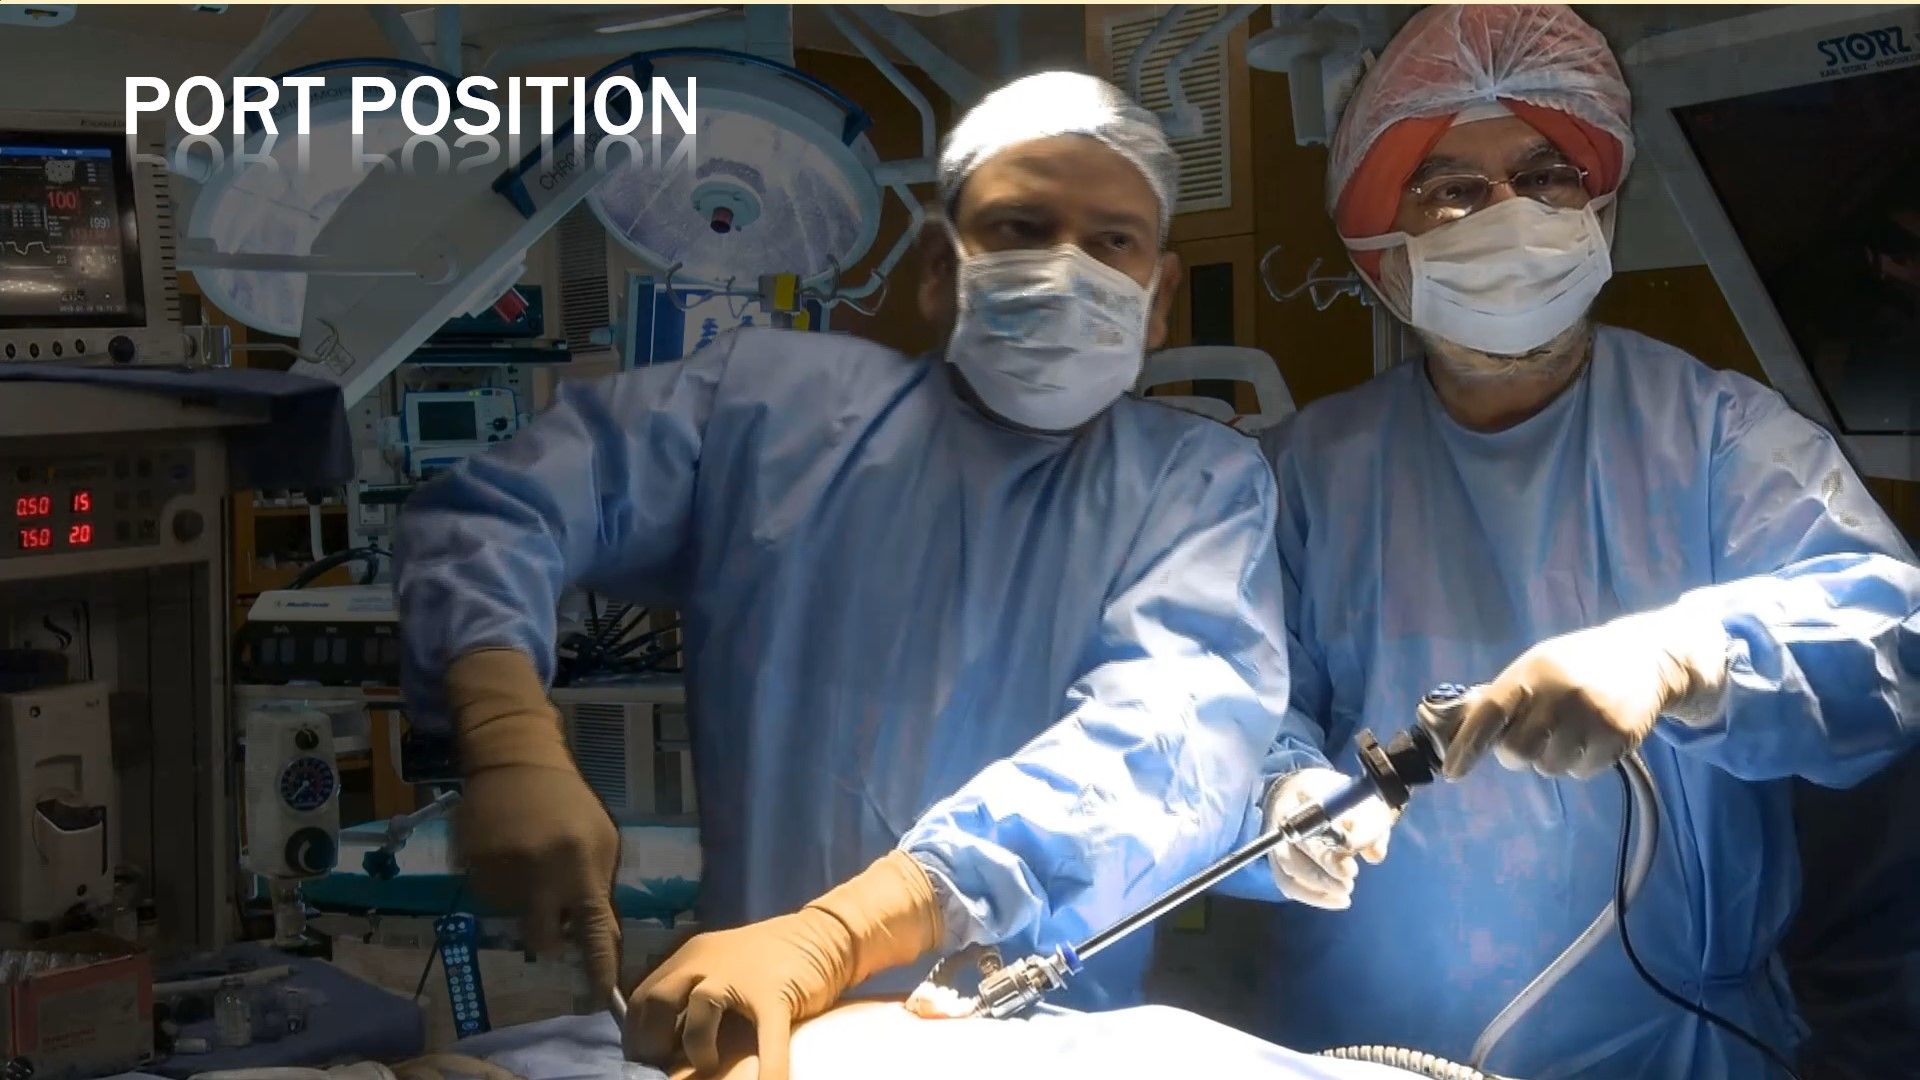
Introduction of Secondary Trocar
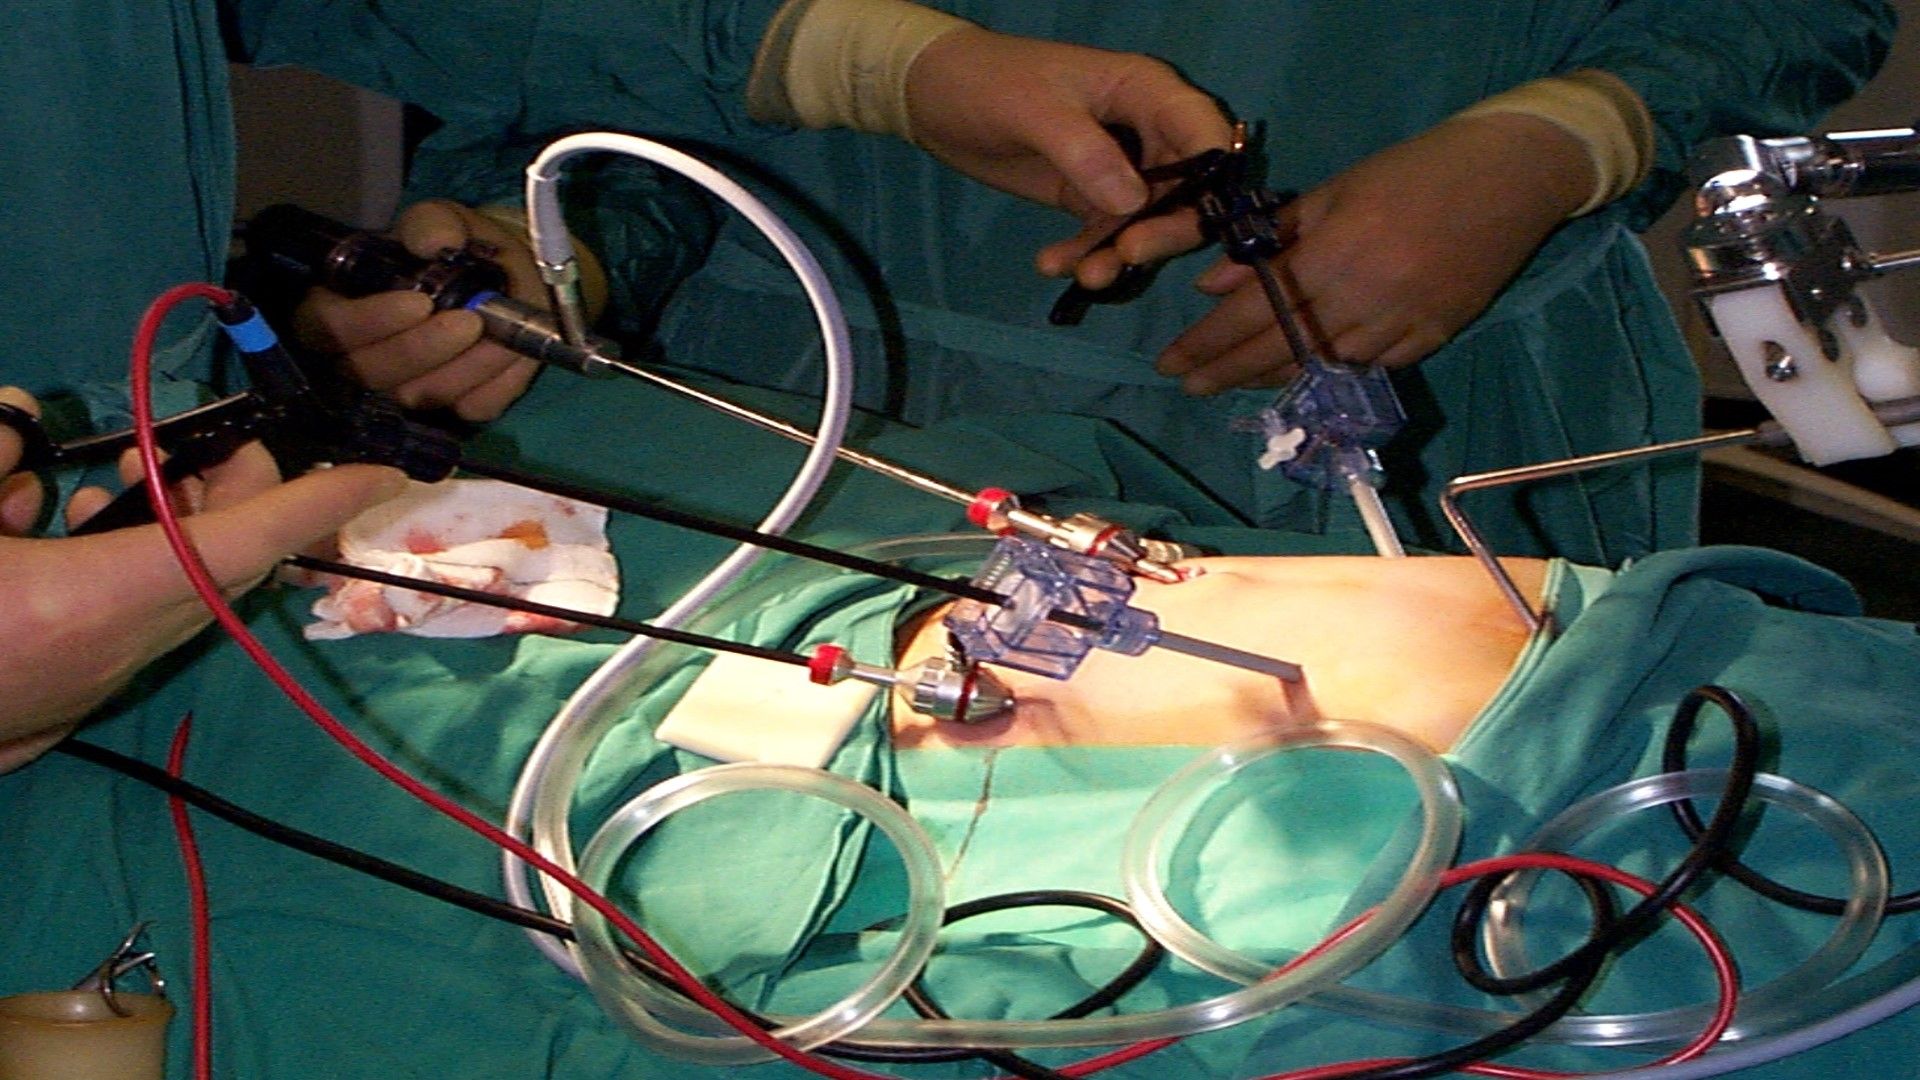
All the ports and instruments should be positioned properly without entangling each other
Slipping of Port
Sometimes, the port wound becomes bigger than the diameter of cannula and it tends to slip out frequently. In these situations, a simple stitch over skin and fixing of the cannula with the help of sterile adhesive tape helps. In pediatric laparoscopic surgery, stabilizing the port is necessary. The reusable metal cannula has trumpet or flap valves. The flap valves can be manually opened when introducing or removing an instrument. This avoids damaging delicate instruments like the tip of a telescope or blunting sharp instruments like aspiration needle and scissors. A reducer tube is used with a large cannula to maintain the gas seal and this automatically opens the valve. Several cannulas modeled on the Hasson cannula is available for use during open laparoscopic procedures. Different sized converters (gaskets) are available for the disposable cannula to maintain the gas seal.
To start any laparoscopic procedure the peritoneal cavity needs to be accessed, first to establish pneumoperitoneum and subsequently to place a port for the laparoscope and add the placement of additional ports for various laparoscopic instruments. In closed access technique, pneumoperitoneum is created by a Veress needle (named for Janos Veress). The Veress needle was originally developed by Janos Veress to give patients with tuberculosis iatrogenic pneumothorax without damaging the underlying lung parenchyma. It has a small-bore (1.8 to 2.2 mm) needle with a spring-loaded protective obturator with a side hole that recoils to cover the end of the needle, allowing entry into a body cavity without traumatizing the underlying organs. The maximum flow of gas through the eye of the Veress needle is 2.5 liters/minute only but for safety, it should be kept at 1 liter/minute to prevent accidental gas embolism. This is a blind technique and most practiced way of access by surgeons and gynecologists worldwide.
When choosing the site of closed access, previous surgical incisions, or any anatomical abnormality, should be noted. Sites that have not been previously instrumented are preferred for initial access. Closed technique of access merely by Veress needle insertion and creation of pneumoperitoneum is an easy way of access but it is not possible in some of the minimal access surgical procedures like axilloscopy, retroperitoneoscopy and totally extraperitoneal approach of hernia repair. In general, the closed technique by Veress needle is possible only if there is a preformed cavity like the abdomen.
The creation of pneumoperitoneum is one of the most important steps in laparoscopy. The aim is to build up a good protective cushion of gas to ensure the safe entry of the trocar and cannula.
Veress Needle Insertion
The standard method of insufflation of the abdominal cavity is via a Veress needle inserted through a small skin incision over the inferior crease of umbilicus. Disposable and reusable metal Veress needles are available commercially in different lengths (8cm to 20cm), i.e. long for obese patients, short for thin or pediatric patients.
Veress Needle inventor Janos Veress
Before using a Veress needle, it should be checked for its patency and spring action. The spring action of Veress needle can be checked by pulling the head out. The disposable Veress needle spring action can be checked by pressing the sharp end against any sterilized draping.
Veress Needle
Insufflation via the Veress needle creates a cushion of gas over the bowel for the insertion of the first trocar. Insufflation then retracts the anterior abdominal wall, exposing the operative field.
Eye of Veress Needle
Parts of Veress Needle
Preparation of Patient
The patient should be nil orally since the morning of surgery. In some of the procedures like laparoscopic hysterectomy or colorectal surgery where distended bowel may interfere, it is good to prepare bowel prior to the night of surgery by giving some mild purgative (polyethylene glycol). Bowel preparation can minimize the need for the accessory port to retract the bowel.
Before coming to the operation theater, the patient should always void urine. The full urinary bladder may get perforation at the time of the insertion of the Veress needle or trocar. If the laparoscopic procedure is of short duration and is going to be performed of the upper abdomen, then Foley’s catheterization is not necessary. If gynecological operative surgery or any major general surgical lower abdominal procedure has to be performed (like hernia or adhesiolysis) it is wise to insert Foley’s catheter.
If a surgeon is going to perform any upper abdominal procedure like cholecystectomy, fundoplication, duodenal perforation, hiatus hernia, etc. it is good practice to have a nasogastric tube in place. A distended stomach will not allow proper visualization of Calot’s triangle and then the surgeon has to apply more traction over fundus or Hartman pouch, and this may cause the tenting of CBD followed by accidental injury. In gynecological or lower abdominal minor laparoscopic procedures, it is not necessary to put the nasogastric tube. In minimal access surgery, shaving of skin is not a must and if necessary, it should be done on an operation table itself by surgeon.
Operating Room Set-up
An organized well-equipped operation theater is essential for successful laparoscopy. The entire surgical team should be familiar with the instruments and their function. Each instrument should be inspected periodically for loose or broken tips even if the same instrument was used during a previous procedure. It is necessary to confirm the proper sterilization of instruments because the surgeon ultimately is responsible for the proper functioning of all instruments and equipment. The entire instrument should be placed according to the wish of the surgeon so that it should be ergonomically perfect for that surgery. The co-axial alignment should be maintained. Co-axial alignment means the eye of the surgeon, the target of dissection, and the monitor should be placed on the same axis.
Patient Position
Initially, at the time of pneumoperitoneum by the Veress needle, the patient should be placed supine with a 15-degree head down. The benefit of this Trendelenburg’s position is that bowel will be pulled up and there will be more room in the pelvic cavity for safe entry of the Veress needle. It is important to remember that patient should be placed in a head-down position only if a surgeon is planning to insert a Veress needle pointing towards the pelvis cavity. If a surgeon is planning to insert the Veress needle perpendicular to the abdominal wall as in case of a very obese patient, previous midline incision or diagnostic laparoscopy in local anesthesia, the patient should be placed in supine position otherwise all the bowel will come just below the umbilicus and there is increased risk of bowel injury.
In gynecological laparoscopic procedures or if laparoscopy is planned to be performed together with hysteroscopy, the patient should be positioned in the lithotomy position and one assistant should be positioned between the leg of the patient. The patient’s leg should be comfortably supported by padded obstetric leg holders or Allen stirrups which minimizes the risk of venous thrombosis. In these procedures, the surgeon needs to use a uterine manipulator for proper visualization of female reproductive organs. The assistant seating between the legs of the patient will keep on watching the hand movement of a surgeon on the monitor and he should give traction with the handle of the uterine monitor in the appropriate direction. If thoracoscopy or retroperitoneoscopy is planned, then the patient is placed in a lateral position.
Patient position in Gynecological Laparoscopy
Patient position in retroperitoneoscopy
Position of Surgical Team
The laparoscopic surgeon is very much dependent and helpless with an eye fixed on the monitor. At the time of laparoscopic surgery, the surgeon is largely depending on his correct standing position. If the surgery is of the upper abdomen, French surgeons like to stand between the legs of the patient, popularly known as “French position”. The American surgeons like to operate from left in cases of upper abdominal surgery like cholecystectomy called “American position”.
It is not always wise to remain standing in any one fixed position and the surgeon can walk to the other side of the operation table to achieve proper ergonomics. In most of the cases at the time of initial access, a right-handed surgeon should stand on the left side of the patient so that he can hold the Veress needle with the right dominant hand. If the surgeon is left-handed, he should stand right to the patient at the time of access and insert the Veress needle or trocar with the left hand. This helps in inserting the Veress needle and trocar towards the pelvis by the dominant hand. Once the Initial Veress needle and first Optical trocar have been introduced surgeon should stand as opposed to the organ which he wants to operate on. Once all the ports are in position, the surgeon should come opposite to the side of pathology to start surgery and he should achieve co-axial alignment means Eye of the surgeon, Target of Dissection, and center of the monitor should be in one linear axis. In cholecystectomy, appendectomy right-sided hernia, or right ovarian cyst, the surgeon should stand left to the patient. In left-sided pathologies like a left ovarian cyst and left-sided hernia, it is ergonomically better for the surgeon to stand right to the patient.
American versus French position
In most of the upper abdominal surgery, the camera assistant should stand left to the surgeon, and in lower abdominal surgery, he or she should stand right to the surgeon. A camera assistant while holding a telescope can pass his or her hand between the body and arm of the surgeon so that some time surgeon can help him to focus his camera correctly. Camera assistant can be placed opposite the surgeon to stand but in this case, it is better to have two monitors on both the side of the patient, one for a surgeon and one for camera stand and other members of the surgical team. The surgeon should work in the most comfortable and less tiring position possible with shoulder relaxed, arms alongside the body, elbows at 90° angle, and forearm horizontal.
Preparation for Access
Before starting access, the abdomen should be examined for any palpable lump. It is wise to tell the patient to void urine before coming to the operating room but if the bladder is found full at the time of palpation. Foley’s catheter and a nasogastric tube should be applied once the patient is anesthetized. Remember that a full bladder or distended stomach may be injured very easily by a Veress needle or trocar.
The surgeon stands left to the patient in most of the right-sided pathology
Once the patient is cleaned painted and draped, all the connections should be attached, followed by focusing and white balancing of the camera. At the time of focusing, the distance between the gauge piece and tip of the telescope should be 6 to 8 cm.
Choice of Gas for Pneumoperitoneum
At first, pneumoperitoneum was created by filtered room air. Carbon dioxide and nitrous oxide are now preferred gas because of increased risk of air embolism with room air. Carbon dioxide is used for insufflation as it is 200 times more diffusible than oxygen and 20 times more absorbable than room air. It is rapidly cleared from the body by the lungs and will not support combustion. N2O is only 68 percent as rapidly absorbed in blood as CO2. N2O has one advantage over CO2 that it has a mild analgesic effect, and hence no pain if diagnostic laparoscopy is performed under local anesthesia. CO2 has the advantage of being non-combustible and allows the concomitant use of electrocoagulation and laser irradiation. For short operative procedures like sterilization or drilling, under local anesthetic N2O may also be used. During a prolonged laparoscopic procedure, N2O should not be a preferred gas for pneumoperitoneum because it supports combustion better than air. CO2 when it comes in contact with peritoneal fluid converts into carbonic acid. Carbonic acid irritates diaphragm causing shoulder tip pain and discomfort in the abdomen. Carbonic acid has one advantage also that it alters the pH of peritoneal fluid (acidotic changes) and it is a mild antiseptic, so the chances of infection may be slightly less compared to any other gas. Helium gas being inert in nature is also tried in many centers, but it does not have any added benefit over CO2. Helium may be a suitable alternative to carbon dioxide for creating pneumoperitoneum in patients with severe cardiorespiratory disease. Some of the studies suggest that pneumoperitoneum with helium will not be associated with profound circulatory depression or oxygen transport abnormalities. In addition, the use of helium is not associated with acid-base disturbances, although central venous filling pressures are similarly increased as with the use of CO2 pneumoperitoneum. However, helium is expensive gas and because of its low water solubility helium has a lower safety margin than carbon dioxide in the event of gas embolism.
Introduction of Veress Needle
To access the abdomen with a closed approach using a Veress needle:
• Apply two Ellis Forceps to evert the inferior crease of the umbilicus
• Give a 2 mm smiling incision in the skin and the subcutaneous tissue over the inferior crease of the umbilicus.
• Hold shaft of the Veress Needle as a Dart.
• Guard the length of the Veress needle needed to reach the peritoneal cavity.
• Place the needle through the incision to the level of the fascia
• Grasp and elevate the abdominal wall with your left hand. It is important to note that grasping only the skin while not including the fascia may increase the rate of the failed entry.
• Hold the Veress needle just over the previously incised site and insert it through the incision at a 45-degree angle towards anus but keep perpendicular to the abdominal wall. This can be only achieved by lifting the abdominal wall adequately by the left hand.
• While inserting the Veress needle feel for two "pops." The first occurs when the needle passes through the abdominal fascia and the second as it passes through the parietal peritoneum. More lateral access sites may have additional "pops" if more than one layer of fascia is traversed.
• As soon as the needle enters the peritoneal space, the displaced hub of the needle will "click" as the protective sheath recoils to cover the end of the needle. After entering an abdominal cavity, the intra-abdominal needle will also move more freely than a needle within the abdominal wall.
Two-Ellis Forceps is applied over the crease of umbilicus
Two-millimeter stab wound over the inferior crease of umbilicus
Veress needle should be held like a dart
Guard the required length of Veress Needle
Veress needle should be pointed towards anus but perpendicular to the abdominal wall
Veress needle should be held like a dart. At the time of insertion, there should be a 45° elevation angle. The elevation angle is the angle between the instrument and body of the patient. To get an elevation angle of 45° the distal end of the Veress needle should be pointed toward the anus. To prevent the creation of a preperitoneal slip of tip of the Veress needle, it is necessary that the Veress needle should be perpendicular to the abdominal wall. However, there is a fear of injury of great vessels or bowel if the Veress needle is inserted perpendicular to the abdominal wall. To avoid both the difficulty (creation of preperitoneal space and injury to bowel or great vessels), the lower abdominal wall should be lifted in such a way that it should lie at 90° angle in relation to the Veress needle but in relation to the body of patient Veress needle will be at an angle of 45° pointed towards the anus. Lifting of the abdominal wall should be adequate so that the distance of the abdominal wall from the viscera should increase. If less than the required dose of muscle relaxant is given in muscular patients, lifting of the abdominal wall may be difficult. In multipara patients, lifting the lower abdominal wall is very easy.
Several tests are available for confirming the Veress needle placement. These include one of the following:
Needle Movement Test
Once the Veress needle is inside the abdominal cavity, the tip of the Veress needle should be free and if the surgeon will gently move the tip of the needle there should not be the feel of any resistance. It is very important to remember that the Veress needle should not be moved inside the abdominal cavity much, otherwise there is a risk of laceration of the bowel to be punctured.
Irrigation Test
A 10 ml syringe should be taken in one hand and the surgeon should try to inject at least 5 ml of normal saline through the Veress needle. If the tip of the Veress needle is inside the abdominal cavity, there will be a free flow of saline otherwise some resistance is felt in injecting saline.
Irrigation test
Aspiration Test
After injecting saline, the surgeon should try to aspirate that saline back through the Veress needle. If the tip of the Veress needle is in the abdominal cavity, the irrigated water cannot be sucked. But if it is in pre-peritoneal space or in muscle fiber or above; the rectus the injected water can be aspirated back. In the aspiration test, if the more irrigated fluid is coming, then the surgeon should suspect ascites, some cysts, or perforation of the urinary bladder. If fecal matter is seen then perforation of bowel may be the reason and if blood is coming then the Vessel injury is the cause. If any fresh blood or fecal fluid is aspirated in the syringe surgeon should not remove the Veress needle and urgent laparotomy is required. Leaving Veress needle in position is helpful in two ways. First, it is easy to find the punctured area after laparotomy and secondly, further, bleeding will be less.
Aspiration test
Hanging Drop Test
Few drops of saline should be poured over the Veress needle and the abdominal wall should be lifted slightly if the tip of the Veress needle is inside the abdominal cavity the hanging drop should be sucked inside because, inside the abdomen, there is negative pressure. If the tip of the Veress needle is anywhere else the hanging drop test will be negative. Once it is confirmed that the Veress needle is inside the abdominal cavity the tubing of the insufflator is attached and flow is started.
Hanging drop test
Measurement of Intra-abdominal Pressure
Measure intra-abdominal pressure by attaching the Veress needle to the laparoscopic insufflator. An intra-abdominal position of the needle is suggested for intra-abdominal pressure ≤10 mmHg. In one large observational study, confirmation of low intraperitoneal pressure was the most reliable method to confirm Veress needle placement.
Once an intra-abdominal position of the needle is verified, initiate gas insufflation (typically carbon dioxide). A properly placed Veress needle will allow the free flow of gas. Tympany should be appreciated with the percussion of the abdomen in the right upper quadrant.
For many years, surgeons have been using a towel clip to elevate the abdominal wall. This towel clip technique of lifting the abdominal wall was advocated by Johns Hopkins University but after some time it was realized that the towel clip technique increases the distance of skin from the rest of the abdominal wall more than the distance of the abdominal wall from the viscera. The abdominal wall should be held full thickness with the help of the thenar, hypothenar, and all the four fingers. It is lifted in such a way that the angle between Veress needles to the abdominal wall should be 90° and the angle between the Veress needle and the patient should be 45°. At the time of the entry of Veress needle surgeon can hear and feel two click sounds. The first click sound is due to rectus sheath and the second click sound is due to puncture of the peritoneum. Anterior and posterior rectus forms one sheath at the level of the umbilicus, so there will be only one click for rectus.
If any other area of the abdominal wall is selected for access surgeon will get three click sounds. Once these two click sound is felt, the surgeon should stop pushing the Veress needle further inside and he should use various indicators to know how far he has accessed. Once the desired length of the Veress needle is introduced in the abdomen the tubing of the insufflator should be attached to the Veress needle. It is important to keep a nice hold on the Veress needle throughout while gas is flowing; otherwise, the Veress needle can slip out and may create preperitoneal insufflation.
Attaching gas tubing with a careful hold of Veress needle and counter twist over leur lock of insufflator tubing.
Beginning of insufflation with careful hold over Veress needle
Insufflation of Gas Test, Quadro-manometric Test
The tubing of the insufflator should be tightly attached with the help of a leur lock of the Veress needle. For safe access, the surgeon should always see carefully all the four indicators of insufflator at the time of the creation of pneumoperitoneum. If the gas is flowing inside the abdominal cavity there should be a proportionate rise in actual pressure with total gas used. Suppose only with the entry of 200 to 300 ml of gas, if actual pressure is equal to preset pressure of 12 mm Hg, that means gas is not going in the free abdominal cavity, it may be in pre-peritoneal space or inside omentum or may be in the bowel. If gas is flown more than 5 liters without any distension of abdomen that may be due to leakage or gas may be going inside the vessel.
Quadro-manometric Indicators of Insufflator
Quadro-manometric indicators are the four important readings of the insufflator.
The insufflator is used to monitor:
• Preset insufflation pressure
• Actual pressure
• Gas flow rate
• Volume of gas consumed.
Quadro-manometric indicators
Preset Pressure
This is the pressure adjusted by the surgeon before starting insufflation. This is the command given by the surgeon to insufflator to keep intra-abdominal pressure at this level.
The preset pressure ideally should be 12 mm Hg. In any circumstance, it should not be more than 18 mm of mercury. Good quality insufflator always keeps intra-abdominal pressure at a preset pressure. Whenever intra-abdominal pressure decreases due to leaking of gas outside, insufflator ejects some gas inside to maintain the pressure, equal to a preset pressure. If intra-abdominal pressure increases due to external pressure; the insufflator sucks some gas from the abdominal cavity, to maintain the pressure to preset pressure. When a surgeon or gynecologist wants to perform diagnostic laparoscopy under local anesthesia, the preset pressure should be set to 8 mm Hg. In some special situations of axilloscopy or arthroscopy, we need to have pressure more than 19 mm Hg.
Actual Pressure
This is the actual intra-abdominal pressure sensed by the insufflator. When the Veress needle is attached, there are some errors in actual pressure reading because of the resistance of the flow of gas through the small caliber of the Veress needle. Since continuous flow of insufflating gas through a Veress needle usually gives an extra 4 to 8 mm Hg of measured pressure by insufflator, the true intra-abdominal pressure can be determined by switching the flow from insufflator off for a moment. Many microprocessors controlled good quality insufflators deliver a pulsatile flow of gas when the Veress needle is connected, in which the low reading of actual pressure measures the true intra-abdominal pressure. If there is any major gas leak, the actual pressure will be less, and the insufflator will try to maintain the pressure by ejecting gas through its full capacity. Actual pressures of more than 20 to 25 mm Hg has the following disadvantage over the hemodynamic status of the patient.
• Decrease venous return due to vena cava compression leading to:
– Increased chance of DVT (Deep vein thrombosis of calf)
– Hidden cardiac ischemia can precipitate due to decreased cardiac output
• Decrease tidal volume due to diaphragmatic excursion
• Increase risk of air embolism due to venous intravasation
• Increased risk of surgical emphysema.
Flow Rate
This reflects the rate of flow of CO2 through the tubing of the insufflator. When the Veress needle is attached the flow rate should be adjusted to 1 liter per minute. Studies were performed over an animal in which direct IV CO2 was administered, and it was found that the risk of air embolism is less if the rate is within 1 liter/minute. At the time of access using the Veress needle technique sometimes, the Veress needle may inadvertently enter inside a vessel but if the flow rate is 1 liter/minute there is less chance of serious complication. When initial pneumoperitoneum is achieved and the cannula is inside the abdominal cavity, the insufflators flow rate may be set at maximum, to compensate for the loss of CO2 due to the use of suction irrigation instrument. This should be remembered that if the insufflator is set to its maximum flow rate then also it will allow flow only if the actual pressure is less than preset pressure otherwise it will not pump any gas. Most of the surgeons keep initial flow rate with the Veress needle to 1 liter/minute and as soon as they confirm that gas is going satisfactorily inside the abdominal cavity by Percussion examination and seeing obliteration of liver dullness, then they increase the flow rate to 3 liters/minute. No matter how much flow rate you set for the Veress needle, the eye of the normal caliber Veress needle can give away CO2 flow at a maximum of 2.5 liters/minute. Once the cannula is in place flow rate can be increased but when the flow of CO2 is more than 10 liters/minute inside the abdominal cavity through the cannula and there is a leak, there is always a risk of hypothermia and dryness of intestine. To avoid this hypothermia in all modern microprocessor-controlled laproflattor, there is an electronic heating system that maintains the temperature of CO2.
Total Gas Used
As soon as 100 to 200 ml of gas is inside the abdominal cavity, the surgeon should do percussion of the right hypochondrium and liver dullness should obliterate with tympanic sound. This is the fourth indicator of the insufflator. Normal size human abdominal cavity needs 1.5-liter CO2 to achieve intra-abdominal actual pressure of 12 mm Hg. In some big size abdominal cavity and in multipara patients sometimes we need 3 liters of CO2 (rarely 5 to 6 liters) to get the desired pressure of 12 mm Hg. Whenever there is less or more amount of gas used to inflate a normal abdominal cavity, the surgeon should suspect some errors in the pneumoperitoneum technique. These errors may be leakage or may be preperitoneal space creation or extravasation of gas.
Tapping over right hypochondrium will demonstrate obliteration of liver dullness
Primary Trocar Insertion
Technical errors in the insertion of trocars after the creation of pneumoperitoneum are the most common causes of injury, resulting from inadequate stabilization of the abdominal wall, excessive resistance to trocar insertion, and excessive, misdirected, or uncontrolled force applied by the surgeon along the axis of the trocar. It is important to stabilize the abdominal wall by full insufflation, complete muscle relaxation, to increase the distance between the anterior abdominal wall and the retroperitoneal vessels and the abdominal organs. It is important to ensure that the skin incision is of enough length and that the reusable trocar tip is sharp so that no resistance is offered.
Trocar and cannula design currently available have several basic features in common. They come in a variety of sizes and the central trocar may have a pyramidal, conical or rounded tip. They have a valve system and a gas input with a tap. These cannulas have a flap, bicuspid or magnetic valves, and care should be taken when passing a telescope through the port that lens of telescope should not hit the valve otherwise it can be damaged. Some disposable cannula has a safety system with a cylinder jumps forward after penetration of the abdominal wall and forms a shield over the sharp trocar tip. This is not foolproof due to shield lag. In the most recent disposable cannula, the trocar itself is spring-loaded. Few optical trocars are also available which has been discussed in the instrument design section of this book.
Reusable Trocar and Cannula
Disposable Trocar and Cannula
The first trocar and cannula inserted are usually 11 mm in diameter. This will accommodate a 10 mm telescope and leave enough space in the cannula for rapid gas insufflation if required.
Steps of Primary Trocar Insertion
Patient Position
As for the Veress needle insertion, the patient should be placed supine with 10 to 20 degrees head-down. The cephalocaudal relationship between the aortic bifurcation and the umbilicus has been studied radiologically. The umbilicus is often located directly above or cephalad to the aortic bifurcation and is consistently located cephalad to where the left common iliac vein crosses the midline. The aortic bifurcation is located more caudal to the umbilicus in the Trendelenburg’s position than in the supine position.
Site
The same site of Veres's needle entry should be used for primary trocar insertion. The inferior or superior crease of umbilicus can be used in average built patient and transumbilical incision can be used in an obese patient. Before the introduction of a trocar, the surgeon should confirm pneumoperitoneum. After adequate distention of the abdominal cavity, the actual pressure should be equal to the preset pressure and gas flow should be stopped.
Before the introduction of the trocar, the initial 2 mm stab puncture wound of skin for the Veress needle should be extended to 11 mm. It should be remembered that the most common cause of forceful entry inside the abdominal cavity with primary trocar is small skin incision. To avoid inadvertent injury of the bowel due to forceful uncontrolled entry, the incision of skin should not be less than 11 mm in size. The skin incision for trocar should be smiling in shape (U shaped) along the crease of the umbilicus to get a better cosmetic value. After giving an 11 mm incision with 11 number blades, the surgeon should spread fatty tissues with Kelly clamp or mosquito forceps. This will also dilate the obliterated vitello-intestinal duct which was demonstrated first time by Scandinavian surgeons so it is called the Scandinavian technique.
2 mm stab wound should be extended to 11 mm
Mosquito forceps tip introduced through a stab wound
Introduction of Primary Trocar
A surgeon should hold the trocar in a proper way. Head of the trocar should rest on thenar eminence, middle finger should encircle air inlet and index finger should point toward the sharp end. After holding the trocar properly in hand, the full thickness of the abdominal wall should be lifted by fingers thenar and hypothenar muscles. After the creation of pneumoperitoneum lifting of the abdominal wall is difficult because it slips. To overcome this, it should be grasped to counter the pressure exerted by the tip of the trocar.
The trocar and cannula should be held like a pistol
Angle of Insertion
Initially, the angle of insertion for primary trocar should be perpendicular to the abdominal wall but once the surgeon feels giving way sensation, the trocar should be tilted to 60 to 70° angle. Insertion of trocar should be in screwing fashion in case of a pyramidal trocar. In disposable bladed trocar screwing the trocar should not be done.
Insertion of trocar by screwing fashion
Confirmation of Entry of Primary Trocar
• Audible click if disposable trocar or safety trocar is used.
• Whooshing sound if the reusable trocar is used (gas passes from the small hole at the tip of the pyramidal-shaped trocar to the head of the trocar).
• Loss of resistance felt both in disposable as well as a reusable trocar.
Once the trocar entry in the abdominal cavity is confirmed, the cannula is stabilized with the left hand, and the trocar is removed by the right hand. After removing the trocar, the cannula is pushed slightly further inside the abdominal cavity to prevent the coming cannula in preperitoneal space with the movement of the abdominal wall with respiration. Once the cannula is in place tubing of insufflator is attached again and flow is restarted to refill the CO2 at a preset pressure. The telescope is introduced slowly keeping the oblique cut edge down in case of a 30-degree telescope. At the time of the introduction of a telescope, it is wise to keep the valve of the cannula open to prevent scratch over the tip of the telescope.
Once the telescope is inside, the elevation angle of the telescope should be 90° with a panoramic vision. The site just below the entry of the primary port is examined for any vessel or bowel injury. Sometime, there may be few drops of blood found just below the site of entry but these few drops of blood is trickled blood through umbilical wound. If the surgeon has any doubt about perforation of bowel or injury to the vessel, he should evaluate this area again after putting other ports.
Insufflator Tubing in reattached once the optical port is introduced
Introduction of the telescope
Initial diagnosis of injury after access
Working Ports
To select the site for a secondary port, transillumination with an illuminated telescope tip should be done first to locate the avascular area to avoid injury of subcutaneous vessels. With the help of mosquito forceps, any remaining skin fiber is breached, and the subcutaneous fat should be cleared. Initially, the direction of entry of trocar is perpendicular but as soon as the tip of the trocar is seen, the direction of the trocar should be changed towards the free space to prevent any injury of underlying viscera.
Introduction of Secondary port
Subsequent Ports
Subsequent trocars are inserted under direct vision at locations appropriate for the procedure and to the anatomy of the individual. If the port is on the opposite side of the patient, it can be introduced the same way but if the surgeon is not able to bend enough to the opposite side, his right index finger can be placed over the head of the trocar and left hand should guard the shaft of the cannula. Alternatively, trocars of the opposite side can be introduced by the assistant. With the slow rotatory movement of the right hand, first, the tip of the trocar should be perpendicular to the skin but as soon as the tip of the trocar is seen the direction of the trocar should change towards the anterior abdominal wall. Alternatively, the surgeon can go to another side of the patient and he can introduce the trocar in a conventional way.
In the same manner, all the working port should be introduced, and instruments are inserted to start the surgery. It should be remembered that the distance between the two ports should never be less than 5 cm. The “Baseball diamond concept” discussed in the next chapter is the most appropriate method to decide the site of the introduction of the working port. The positioning of operative ports is an important factor in determining the ease with which a procedure is carried out. It is a skill that must be learned.
Introduction of Secondary Trocar
All the ports and instruments should be positioned properly without entangling each other
Slipping of Port
Sometimes, the port wound becomes bigger than the diameter of cannula and it tends to slip out frequently. In these situations, a simple stitch over skin and fixing of the cannula with the help of sterile adhesive tape helps. In pediatric laparoscopic surgery, stabilizing the port is necessary. The reusable metal cannula has trumpet or flap valves. The flap valves can be manually opened when introducing or removing an instrument. This avoids damaging delicate instruments like the tip of a telescope or blunting sharp instruments like aspiration needle and scissors. A reducer tube is used with a large cannula to maintain the gas seal and this automatically opens the valve. Several cannulas modeled on the Hasson cannula is available for use during open laparoscopic procedures. Different sized converters (gaskets) are available for the disposable cannula to maintain the gas seal.